Some of you might have seen something called Microsoft Dev Box flash by in your feeds. Something called Dev Box doesn’t really sound like something device-related, it sounds more like something your developers would care about. They probably will, but there is a big reason you should care too.
Microsoft Dev Box is a new tool in the toolbox for you, this time to provide Cloud PCs to your developers or such. There are many similarities between Dev Box and Windows 365, but also Azure Virtual Desktop (AVD). However, your developers can themself deploy computers to your tenant based on a template that you create, which means that a developer could create a new test PC when they need one without really involving you as an admin.
Microsoft Dev Box is not licensed-based like your Windows 365 Cloud PC, instead, it’s consumption-based like an AVD. But you have the simplicity of setting up new computers from Windows 365, so it’s almost like a mix of the two. However, the user target group is different since you can get more powerful machines that are deployed by the user themself.
You can read more about the Microsoft Dev Box here, and what Microsoft calls a “Dev Workstation in the cloud”.
Getting started with Microsoft Dev Box
To get started with Microsoft Dev Box you need the following:
- An Azure subscription
- Azure AD
- Intune tenant
- Windows licenses (typically as part of your EMS or M365 license)
Setting up the Microsoft Dev box is completely taken care of in the Azure portal, not the Microsoft Endpoint Manager admin center.
To start off, you need to head over to portal.azure.com and make sure you have an active Azure subscription to provision this. Then, search for Microsoft Dev Box.

This is where your different environments will be hosted. You can have multiple Dev Boxes set up for different parts of the organization. In each Dev Box, you can also create different projects. In the real world, you would probably configure this in a landing zone specifically set up for your dev-users who will work on certain projects.

The first step is to create a new Dev-center by pressing “+ Create” in the Microsoft Dev Box pane. Select what subscription and resource group you want to deploy this too and give your Dev-center a name. You will also need to select an Azure region where your machines will be hosted. Since this is a preview, the selection of what Azure data center regions are available is limited. Once you have selected this, press “Review + Create” and create your Dev-center.

Once the Dev-center has successfully deployed, you need to create a Network Connection where you define if your Dev Box PCs should be hybrid-joined or Azure AD joined. Head back to the Microsoft Dev Box pane and select Network Connections (or search Azure for Network Connections).

Select “+ Create” to create a new Network Connection by selecting what subscription and resource group to use. Also, give the network connection a name and select what Azure Vnet you would like to use (if you haven’t created a Vnet already, you will need to do that first). Press “Review + Create” and create your Network Connection.

In this example I’m using Azure AD joined devices as selected as “Domain join type”. If you want to use Hybrid join instead, you will need to add some additional information about your domain.
Once you have created your Network Connection, you will need to create a project. This is where gather each project you would like to use the Dev Box PCs in and define what machines are available by creating Dev Box pools. In the Microsoft Dev Box pane, select Projects.

To create a new Project, click “+ Create” and select what subscription and resource group you want to use. Select which Dev-center you would to use and give your project a name. Press “Review + Create” and create your Project.

Now we need to define what machines are available for our users by creating a Dev box pool. There are a few different “sizes” available, and you can read more about them on Microsoft site about Microsoft Dev Box, where you can find out the pricing for each.

To create a new Dev box definition, navigate to the project you created earlier and select Dev box definition on the bottom of the left-hand menu.

To create a new Dev box definition, select “+ Create“. Give your definition a name and then select a Windows image to use, in this example we will use a Microsoft-provided image, but you could upload your own if you would like. Make the appropriate selections of what size you would like on the machine and click “Create”.

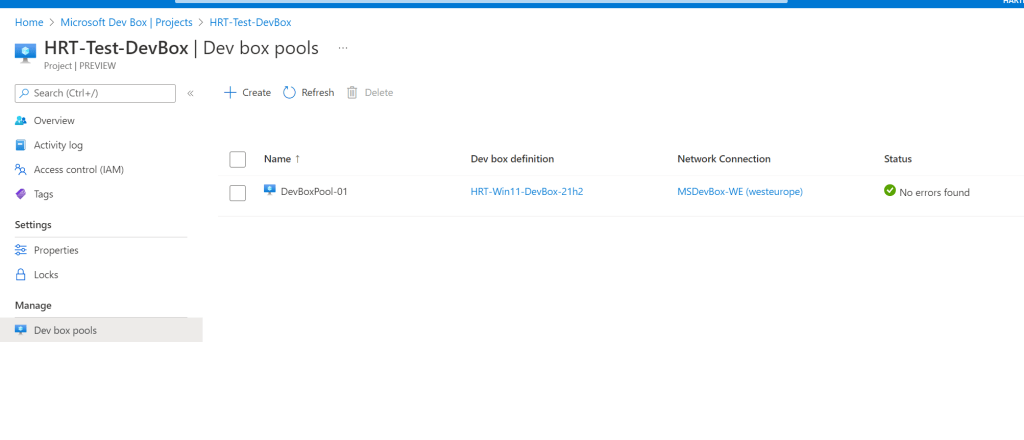
The next step is to create a Dev box pool in your project, do this by navigating to your project you created earlier and selecting Dev box pool.

Create a new Dev box pool by pressing “+ Create” and giving your new pool a name. Select the Dev box definition created earlier and also the network connection. You will also need to confirm that your organization has Azure Hybrid Benefit, you can read more about what that means here.

Once you have filled out this, create the dev box pool by clicking “Create” at the bottom of the page.
The last thing we need to do is to assign users the rights to consume machines and work in our project. Prior to this, it’s a good idea to create an Azure AD group that will contain our users.
To configure the access to our project we will head into “Access control (IAM)” in our project.

To add a new assignment, click “+Add” and select “Add role assignment”. In the list of roles, find and select the “DevCenter Dev Box User” role and press next.

On the next page, add your Azure AD group which contains the users who should have access to the project. Once you have added this group to “Members” press “Review + assign” to finalize your role assignment.

You can verify that the assignment was successful by looking in the list for the role and validating that your group is listed.

And that’s it! You have now successfully prepared your environment to use Microsoft Dev Box!
User experience
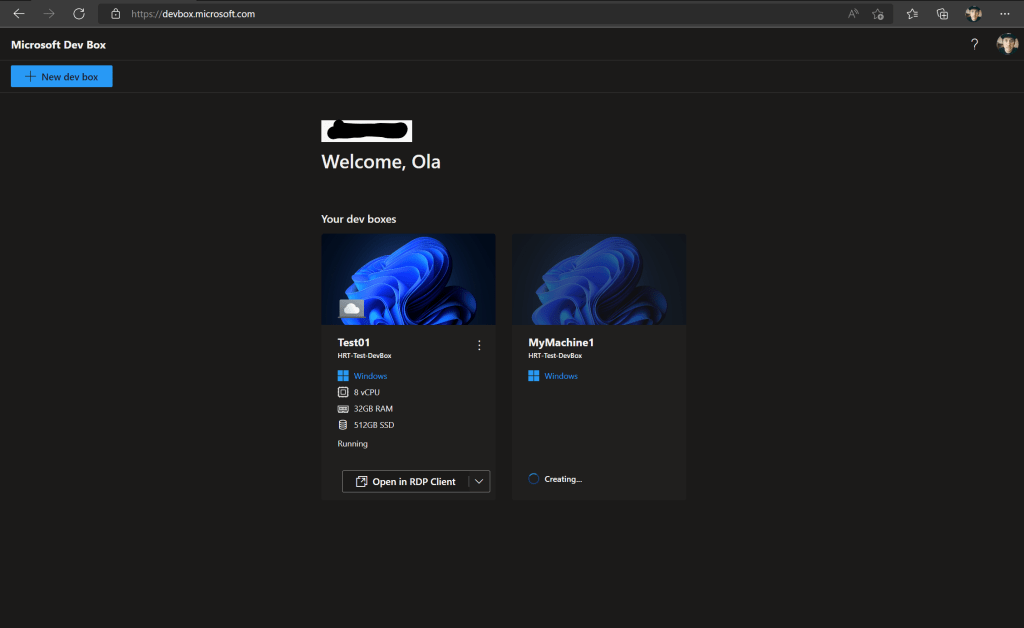
For users to create new Microsoft Dev Box machines, they will need to access devbox.microsoft.com and sign in with their user account.
Once signed in, the experience is similar to the Windows 365 end-user portal, but there is a new button called “+New Dev box” where users can deploy machines themself.

Once you click that button, a fly-out will appear where you can see the specification on the machine you are allowed to deploy (based on the definition we made earlier) and you are asked to give your machine a name. Once you have given the machine a name, which will be the name displayed to you for your convenience (MEM will show a CPC-xxxxx name), press “Create“.

The creation of a machine will take somewhere around 30-90 minutes. Once the machine is done, it will show in the portal where you are right now but also in the Remote Desktop app where you have all your other Windows 365 machines. A bonus fact is that it will also appear in the Windows 365 portal, marked as Dev box, but you cannot create new machines from there.

Once the machine has been created, you can connect to it and start using it!


Leave a Reply