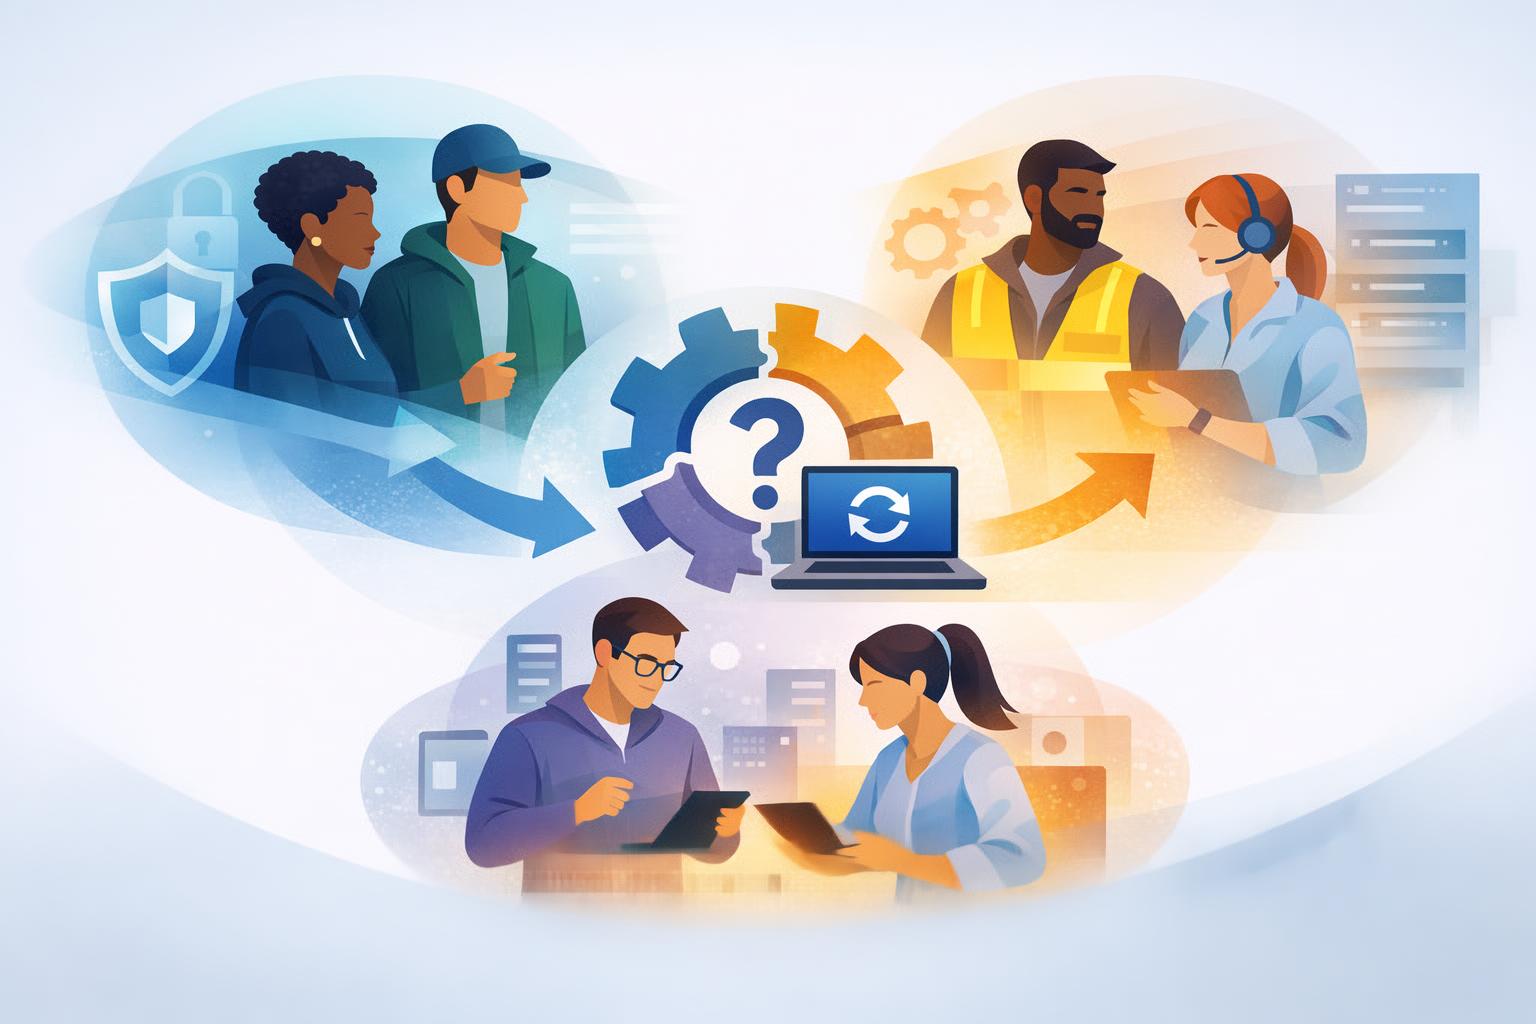
• Running Microsoft Teams in Windows 365 Cloud Apps

    Running Microsoft Teams in Windows 365 Cloud Apps

    If you have played around with Windows 365 Cloud Apps, which currently is in public preview, you might have noticed that unless you create a custom image you can only publish a subset off applications. However, MSIX applications like MS Teams is currently not supported.

    One feature that you MIGHT have missed with Cloud Apps is that published apps are allowed to launch other apps.

    This means that we can actually start applications we didn’t publish. Which can be a lot of fun to play around with, or if you publish Outlook and need to open an attachment.

    If you want to read more about the Windows 365 Cloud Apps, you can check out the Microsoft Learn page here.

    What I also noticed thanks to a fellow Windows 365 friend, was that if we download let’s say Teams. We can install and run it from the Windows 365 Frontline Shared Cloud PC which is in the back of Cloud Apps.

    What you need to keep in mind however is that once your session ends and your user profile is thrown out; your applications will be gone. Windows 365 Frontline Shared is still running in the background for this, which means that we have the Windows 365 version of a non-persistent Cloud PC.

    Before we get started, I just want to point out that this is more poking around with Windows 365 Cloud Apps rather than being a useful scenario. But it also means you can try stuff out on a conceptual level to figure out if Cloud Apps would work in your organization in the future. I also want to point out that none of these things are supported use of the Windows 365 Cloud Apps, just to be clear on that!

    What apps can I install and run?

    What I’ve found while playing around with this, is that there are some apps which will work and some which will not work. The ones that tend to work is applications which does not require administrator privilege to install (like Teams, Spotify, VScode, Chrome or most apps in the Microsoft Store). These are installed in the user directory where I’m allowed to make changes without being an admin.

    When I tried installing Audacity, which requires admin approval, I was meet with this window asking for admin credentials. For me, it just looped when entering credentials with admin privileges. I also tried to launch an elevated PowerShell session, but it wont let me.

    But I can without a problem install and run Teams and VSCode.

    The downside of this is once I close the application, there is no good way to get back to it. With Teams you can just click the install file or “Open in Teams” if you are using Teams on the web. But for other applications its a bit tricker such as VSCode in this example where I need to run the installation again.

    What more can we do? Well we can start the Microsoft Store by browsing to the web version and click “Open Store app” unless you block it with any policy in your environment.

    From here we can just find let’s say Windows Terminal and launch it.

    And now we have the Terminal running in our Cloud Apps making it possible for us to access even more apps from e.g. Winget or launch about anything we want.

    But let’s move back to Teams.

    Installing and running Microsoft Teams

    Being able to run other apps which are not published is quite a good thing since this means that we can open links and other things. What did surprise me was that I out of the box can install applications which does not require administrator privileges.

    Like I said, Microsoft Teams is one of those apps and maybe an app which is interesting for many to use. So far, I haven’t found a good way to do it but I think it’s a good start that you can do it. And it shows that “yeah we can use Teams this way”.

    How I setup this to work is that I defined the start page Microsoft Edge to be the download page of Microsoft Teams through an Intune policy. When I launch my Edge Cloud app, the Teams installation file is automatically downloaded and once I click “Open file”, Teams will install and launch.

    You could also do this from the Teams web app, and select to download the desktop app. What I’ve noticed is that sometimes you might need to open it several time before it actually launches. But once it has launched, you can use a fully Cloud PC optimized Teams!

    Bonus finding

    While playing around with this, I also noticed that I could open the file explorer through the download tab in Edge by pressing the small folder next to the file name.

    If you navigate to “%ProgramData%\Microsoft\Windows\Start Menu\Programs” you will find all the apps listed in the Windows 365 Cloud Apps page, which is the default start menu for all users on this Cloud PC.

    Key take aways

    Being able to launch applications which are not published could be really useful, and making it possible for me to install something and just run that application while my session is active.

    What is even more useful is that this is applicable for wherever you can use the Windows app. So, I can run the Edge Cloud App from my iPhone and launch Microsoft Teams. Don’t ask me why I would, but I can.

    Given that this is a preview feature, and Microsoft has stated that a lot of things are in the making (like discovering MSIX applications like MS Teams), I would say that this is more fun to play around with than actually useful in a production scenario or real-life scenario. If running Teams as a Cloud App is an important feature for you, I would suggest you wait for the final product rather than doing this hack/workaround since this is not supported.

    If you just want to mess around and try out what you could do, feel free to explore this further and if you figure out any cool scenarios, share them!

    Given that this is in preview, I would assume that it’s not in it’s final shape and form. While writing this, Microsoft Ignite is around the corner and we can always hope for some cool updates related to this!

  • I took Windows 365 Link for a test drive

    I took Windows 365 Link for a test drive

    At Microsoft Ignite last year (2024), Microsoft release a small black computer called Windows 365 Link which I wrote a post about which you can find here.

    In the first release wave, only a few countries were included. When this post is being written, the second wave has just been announced and we now have the Link available in the following countires:

    • Australia
    • Canada
    • Denmark
    • France
    • Germany
    • India
    • Japan
    • Netherlands
    • New Zealand
    • Sweden
    • Switzerland
    • UK
    • USA

    And since I’m based in Sweden, we were included in the second wave so I just got my hands on a test unit!

    What is the Windows 365 Link and first impressions

    So the Windows 365 Link is a small computer, which is surprisingly heavy given it being a little bigger than an Apple TV. It’s a compact device and it feels sturdy. It has a matt black plastic casing and a non-slip bottom.

    The concept of Windows 365 Link is to be 100% honest not new on the market. Thin clients have been around for a long time. But this is like Windows 365 in general, it’s just made way simpler. It’s your link to Windows 365 and built for Windows 365 and not to work with any virtual environment. For what it’s built for, it’s an awesome device. Oh, and the best part (in my opinion) is that it runs Windows, and you manage it from Microsoft Intune. This means that your device management team can just treat it like any Windows device.

    When I first setup the device, I thought I did something wrong because I just booted it up, connected to a Wi-Fi and signed in. Then I was done. It was super fast and I was sure that something went wrong since I hadn’t added it to the corporate device identifier list for device preparation. Turns out I had enabled personal devices for testing something a while back and hence it went straight through!

    Before we start

    One thing you will learn either the hard way or if you read the Microsoft documentation, is that it’s recommended to supress the SSO prompt you get when you sign into a Cloud PC the first time. Using SSO with your Cloud PC is a requirement in order to use the Link.

    You will do this in two steps and I found the Microsoft documentation fairly easy to follow along. What you need to initially do is to create a Entra ID group where you place all your Cloud PCs (dynamic group would be preferred). You can use a dynamic device group query like this one:

    (device.deviceModel -startsWith "Cloud PC")

    When you have created your group, follow these two steps.

    1. Configure single sign-on for Azure Virtual Desktop using Microsoft Entra ID | Microsoft Learn
    2. Configure single sign-on for Azure Virtual Desktop using Microsoft Entra ID | Microsoft Learn

    What this does is to supress the SSO pop-up which will prohibit you from actually signing in to your Cloud PC on a Windows 365 Link since the Link does not support this interaction at this point in time.

    Setting up the device

    But how would we set up the device in a proper way?

    To be honest, Microsoft own guide for this is so good and easy to follow so I won’t even try to recreate it. You can find it here!

    In order to successfully enroll the device, you also need a Device Preparation Policy which is not described in the guide. If you have been playing around with this for physical devices (often called Autopilot V2), you can re-use the one you have. Otherwise, here is a guide to create one.

    Since most companies does not allow personal devices to be enrolled, you got two options. Create a new enrollment restriction policy targeting ONLY your Windows 365 Link devices (this is described in the Microsoft guide), or you need to add them to the “Corporate Device Identifier” list. You need to upload a CSV with all your Windows 365 Link device you want to enroll. The format should be something like this:

    Microsoft Corporation,Windows 365 Link,[DEVICE SERIAL NUMBER]

    What this does, is to allow you to enroll devices which are pre-registered using Device Preparation.

    When you have gone through all the preparations, you are now ready to go!

    Just plug it in to a monitor, connect keyboard and mouse!

    When enrolling the device, you can either join it as a personal device or as a shared device using a Device Enrollment Manager (DEM) account (we haven’t seen the need for those in a while). Depending on your usage scenario, you choose one of those, but the enrollment will happen in the same way.

    The OOBE is a lot slimmed down compared to a normal PC. You basically miss the enrollment if you blink. Enrollment is done with a personal user if this will be a user’s primary device, your you can enroll it using Device Enrollment Manager (DEM) account if it’s a shared device.

    When the enrollment is done when you are asked to sign in to your Cloud PC, and this means that you are ready to go!

    Using the Link

    I’ve been forcing myself to use the Link as my daily driver when working from home. Just to get sense of what the experience is. My experience with using thin clients is quite limited, so I might be blown away by obvious things here. But then you need to take into consideration that I come from a pure Intune background and my experience with the virtualization space is Windows 365.

    I’m really impressed by the responsiveness and how smooth the user experience is. When using it as my daily driver, I sometime forgot that I was using Windows 365. The experience is that good!

    What I do miss however is to be able to use Windows Hello for Business to sign in. I can use a FIDO2-key (like a Yubikey which I’m using) which works really well. But I can’t use my fancy Logitech camera with support for Hello. I kind of get it since this device has been positioned for hot desking. So, it makes sense from that aspect.

    What I do miss however is a USB-C port on the front. There are a few ports, including one USB-C port on the back. But on the front, we only get a USB-A. If you have gone for a more future proof FIDO2-key with USB-C, this gets a little bit more complicated to use since that port is on the back.

    I think one thing that becomes important as well might be to have a screen with a built in USB-hub. If you have a headset, mouse/keyboard and a web camera, you are missing one USB-port (if not one of these are USB-C).

    What I like and don’t like

    Overall, I really like the simplicity of the Windows 365.My “home office test” is probably not the ideal use case for this device. It makes more sense in shared office space to be honest.

    What I did like:

    • The simplicity.
    • The esthetics. It’s sleek and pretty discreate.
    • The “like local experience”. It makes Windows 365 feels like a physical PC.

    What I think could be improved:

    • The number of ports.
    • The lack of a dedicated user mode. (I get why though).
    • No way to control sound output source.

    My two cents

    Should you buy one for your personal office space? Probably not. It’s a nice device. But you kind of notice from the experience that maybe this is not really ment for personal use.

    Should you buy it for a shared workspace or hot desking? Absolutely! A great way to create a simplified shared environment.

    The more hardcore virtualization people will claim that “this is nothing new, it’s just a Microsoft thin client” and that is true. But what I really love about this is that your device team can deploy this by using the tools they already have. Sure, you don’t get the perks that e.g. IGEL brings, and you are locked into Windows 365 only (no AVD). But if you are looking to make a move to simplify your setup and use the “Windows 365 mindset” this device makes perfect sense.

    One thing I’ve heard people comment on is that: “there is no way to install agents on it, we require a webfilter/proxy agent for all our devices on the network”. To be honest, this device should live on the internet and not corp-net. All user traffic happen from the Cloud PC where you can have this agent installed. There is no way the end-user can browse the internet from the Link it-self. If you look at the documentation Microsoft specify which ports and URLs needs to be allowed in your firewall/proxy. I know we are not in a world where we put our devices on a pure internet connection yet (the zero trust way of doing things). Maybe this could be the driving factor to re-think how we are using devices in the office?

    Is it the perfect device? Probably not. Can you buy something else and get the same user experience? For sure.

    But can you buy something else and have such a simple end-to-end solution? No!

    I think this is where the Link fits into the puzzle. It’s simple and if you are just entering the world of Windows in the Cloud, this is a great entry ticket! It’s not just about the Link as a standalone device. You need to look at it as a part of a bigger picture and a key player in the Windows 365 eco system.

    After using it for a few days, I’m even more convinced that Windows in the Cloud is the future for Windows. Sure, you can close your laptop and just return to where you left of. But imagine being able to just leave the laptop and keep working from whatever device you have at hand, where you left of. We are only in the beginning of a reinvention of how we use Windows in our day-to-day life!

  • Summer recap – 2025 edition!

    Summer recap – 2025 edition!

    Living in the Nordics means that from around mid-June to mid-August everything basically is put on halt due to summer vacations. And that means that more time is spent away from the computer than at the computer for me.

    So let’s do a recap of what did we miss during the summer vacation period. Here are the stuff that I found most interesting which were announced during the summer!

    I’m on purpose leaving out all the community updates and things which were released during the summer. Let’s focus on what Microsoft put out there!

    What I’m personally most hyped about is that I’m going to Berlin in September to talk at AVD TechFest where I will talk about how you manage your Cloud PCs and also some sustainability aspects of using Windows 365!

    I hope to see you all there.

    Windows news!

    Windows 2030 vision – Security

    Microsoft has released the first part of a series with the vision for what Windows will be in 2030. Really interesting video and concept, given that we are only 5 years away.

    Security leadership in the age of constant disruption | Windows Experience Blog

    Windows 11 25h2 information!

    As we all know, Windows 11 will get its annual update during the fall. Microsoft has released more information about the update, and we are looking at a smaller update compared to the 24h2 one.

    Get ready for Windows 11, version 25H2 – Windows IT Pro Blog

    Windows 11 cloud-native migration with Microsoft Intune

    Are you looking to move to cloud native? This article from Microsoft gives some great guidance.

    Windows 11 cloud-native migration with Microsoft Intune

    Microsoft Connected Cache in GA

    Want to save some bandwidth when deploying updates? Have a look at Microsoft Connected Cache which when into GA during the summer!

    Microsoft Connected Cache is now generally available – Windows IT Pro Blog

    Resilience in action for Windows devices and Quick Machine Recovery

    Microsoft is committed to increase the resilience in Windows and have put out a blog post talking about what investment they are doing. One of these things is the Quick Machine Recovery feature which will enable you to restore a broken computer faster!

    Resilience in action for Windows devices

    Hotpatching for ARM64

    If you have been using Windows Hotpatching you might have noticed that ARM64 devices was not included. During the summer, Microsoft announced that ARM64 devices will now be able to utilize this feature as well!

    Hotpatching now available for 64-bit Arm architecture – Windows IT Pro Blog

    Windows release information toolbox

    Are you struggling with finding where you can find all the release information you need for Windows can be found? Microsoft has created a one-stop-shop for you over at https://aka.ms/WindowsReleaseHealth and you can read more about it here:

    Your Windows release information toolbox – Windows IT Pro Blog

    Upgrade to Windows 11 with Autopatch – Playbook

    Are you looking to move faster to Windows 11 since Windows 10 is going out of support on October 14th this year? Did you know you could utilize Windows Autopatch to do the upgrade for you? Check out this playbook from Microsoft how to use it!

    Upgrade to Windows 11 with Windows Autopatch groups – Windows IT Pro Blog

    Windows 365 news!

    Intelligent pre-start for Windows 365 Frontline in dedicated mode (preview)

    Microsoft has released a preview of intelligent pre-start for your Frontline Cloud PCs in dedicated mode, making the start-up time even faster. It has to learn the users behaviour, but will improve the user experience!

    Intelligent pre-start for Windows 365 Frontline in dedicated mode (preview)

    Select redirections disabled for newly provisioned and reprovisioned Cloud PCs

    Windows 365 is enhancing Cloud PC security by having clipboard, drive, opaque low-level USB, and printer redirections disabled by default for all newly provisioned and reprovisioned Cloud PCs. 

    Windows 365 Reserve

    This one is one of my favourite news. The Windows 365 Reserve feature which was announced and put into limited preview during the summer. The concept around Windows 365 Reserve is to offer a way to get productive if your computer fails for some reason. You can quickly get a Windows 365 machine up and running which you can use for up to 10 days while your computer is being fixed or restored from ANY device (since you can use Windows 365 from any device you like).

    Enhancing business continuity: Windows 365 Reserve is now in limited public preview! | Microsoft Community Hub

    RDP Multipath is now generally available 

    Improving on user experience and performance, RPD Multipath will improve your connection reliability by evaluating multiple network paths between your physical and Cloud PC/session host. This went into GA during the summer!

    RDP Multipath is now generally available for Azure Virtual Desktop and Windows 365 – Windows IT Pro Blog

    Whats new in Windows 365

    There was also a bunch more news around Windows 365 which you can find here: What’s new in Windows 365 Enterprise | Microsoft Learn

    Intune news!

    Security Copilot for Intune GA

    Security Copilot for Intune has been in preview for a while now been released as GA. It still requires you to have SCUs deployed in your environment and that you are using Security Copilot.

    Microsoft Copilot in Intune features overview | Microsoft Learn

    Platform SSO for macOS GA

    After being in preview for quite some time, platfrom SSO for macOS has now been moved to GA!

    Now Generally Available: Platform SSO for macOS with Microsoft Entra ID

    Whats new in Intune

    There was also a bunch of other Intune news during the summer, which you can find here: What’s new in Microsoft Intune | Microsoft Learn

    Other news!

    Edge got a new Copilot feature, and the Copilot button moved a bit. A new interesting way of browsing the web and using Copilot to assist you!

    Introducing Copilot Mode in Edge: A new way to browse the web – Microsoft Edge Blog

  • I messed up Teams so you don’t have to!

    I messed up Teams so you don’t have to!

    For the last two months I’ve had a weird error on my Copilot+ PC. When ever I try to join a Teams-meeting, nothing happens. It just kills the process. I’ve spend a few minutes here and there trying to figure out what the problem was, but never really found anything (troubleshooting is not my favorite topic). Since it only affected my ARM-based device and none of the X86-based devices nor my Cloud PC, I could still work.

    But then I enrolled a second ARM-based device, and it got the same problem. So I decided to actually put some time into it.

    Where did I start?

    Initially I was really convinced that “okay Defender is blocking this” since I found that Defender flagged some Teams meeting links as malicious. But turns out, it didn’t actually block it. How did I come to this conclusion?

    Well, Teams worked as intended if the PC was unmanaged, leading me to think that “yes its Defender for Endpoint” until I enrolled the device again and excluded ALL policies and never onboarded it to Defender for Endpoint.

    And guess what? Still same issue… Teams would start meetings and webcam and microphone was grayed out.

    So what next?

    Teams logs

    This is probably where any sane person would start, but I didn’t.

    After exporting the Teams logs and getting some help from ChatGPT, I found that Teams is trying to load a component called VDIBridge, but it fails. And it was not just once. This lead me to research that a bit, and it turns out that this is a server-side channel module, which among other things redirects media to the local endpoint. The VDIBridge is bundled with the VDI version on Teams.

    Okay, so Teams on my ARM based Windows PC thinks it’s a virtual device. That is VERY strange!

    I compared it to X86 device which had all the policies from my tenant, but with Teams that works, and found that it does not have this error.

    So for some reason, on my ARM device, Teams is convinced it’s a VDI and not a physical PC.

    Trying workarounds

    This lead me into researching why my ARM device would identify as a VDI in Teams eyes.

    The internet told me that “there might be variables added by Intune” and “delete the ¨’IsWVDEnvironment’ if it’s set to 1 registry key”.

    But I didn’t have any variables in my Intune environment which got added not did I have that registry key, and I even tried creating it and setting it to 0. But it didn’t help.

    How ever. I found one thing that planted a thought in my head, that if you have some Citrix registry keys or applications installed on the device, this COULD happen on ARM based devices. But I don’t have any Citrix software deployed to my machines.

    But I do have Microsoft software assigned to my devices…

    Looking through what apps are being pushed from Intune

    Since unmanaged devices didn’t have this issue, but managed had, I decided to have a look at what applications I install on all my devices.

    I had the usual stuff, Microsoft 365 Apps for Enterprise, Teams, Spotify, the Windows app. And then I found two weird ones:

    • Remote Desktop Multimedia Redirection Service
    • Remote Desktop Services Infrastructure Agent

    These are two applications that are used within virtual environments, and especially the first one, Remote Desktop Multimedia Redirection Service, is telling the VDI to redirect things like Teams meeting audio/video to the local device. The other one is used to communicate with the Remote Desktop Service from the session host.

    These are two applications you install on virtual machines, not on physical machine.

    Turns out, I for some reason had assigned it to all my Windows based devices, not only Cloud PCs.

    What now?

    So first action, remove these from the assignment from my physical devices in Intune and make sure we uninstall it from all the physical machines.

    In order to make sure this was actually what caused it, I manually uninstalled both of the applications from my ARM device and then I re-installed Teams.

    And Teams worked.

    Leason learned

    So what did we learn from this?

    Well don’t assign applications built for virtual clients to redirect things on physical machines.

    For some reason, it works without any issues on X86 machines, hence me not realizing initially that there was an issue. On ARM devices, it all of a sudden tells Teams that “hey, I’m a VDI! Let’s try to redirect the media onto the local device” and fails.

    This also means that if you are deploying applications meant for VDIs, make sure not to deploy them to your physical machines. Use filters or dedicated groups and don’t do like I had apparently done. Deploy it to all devices.

    And this is again why I hate computers!

  • Making changes to existing Cloud PCs

    Making changes to existing Cloud PCs

    Since Windows 365 and Cloud PCs is a service which is constantly being updated with new feature and available regions, making updates to an existing provisioning policy and all your existing Cloud PCs.

    A while back, Microsoft introduced the possibility to apply the updates provisioning policy to all existing Cloud PC, but this will not cover all modifications, some need a re-provisioning. But if we look at things we can update without re-provisioning the Cloud PC, we have three things:

    • Changes to Entra single sign-on for all devices
    • Changes to region or Azure network connection for all devices
    • Changes to region or Azure network connection for a single device

    For enabling single sign-on (SSO), the Cloud PC will not need to be restarted unless it was provisioned prior to April 2023. For changes to the region or Azure Network, the Cloud PC will be shut down during the move and unavailable to the end-user, meaning that this needs to be planned and users will lose any unsaved data when they are disconnected due to the move.

    But let’s look at each one of these and see how they work.

    Changes to Entra single sign-on

    Back in 2023, Microsoft finally made the move to put the single sign-on as generally available after having been in preview for quite some time. This is, when I’m writing this, about 2 years ago meaning that a lot of organizations might have already enabled this. But if you haven’t this is how its done.

    In Microsoft Intune, navigate to Devices and Windows 365 and select the Provisioning policy tab to view all your policies. Find the policy you want to update and select it. Click on “Edit” next to General to edit the part where SSO is located.

    At the bottom of the page, find “Use Microsoft Entra single sign-on” and check the check-box next to it. Then press Next then Update at the bottom of the screen to update the policy.

    You have now successfully updated the policy for all NEW Cloud PCs being created with this policy. But what about the existing ones?

    Well, back at the policy overview page, you have an option to select “Apply this configuration”, which makes it possible to update existing Cloud PCs with some of your updated configuration.

    When you click the “Apply this configuration” button, you will get three options where you select “Microsoft Entra single sign-on for all devices“, since we want to update the SSO settings.

    When you click this option, you will get a notification that the update has started.

    If your Cloud PCs where provisioned before April 2023, the Cloud PC will shut down during the update. Please notice that this does not happen instantly, it can take a while to apply for all machines in a larger environment.

    Changes to Region or Azure network connection

    The other change you can do is to move the Cloud PC to a new region. This could be due to that the user has moved location or due to new regions opening up and you want to move the Cloud PC closer to the end-user. Or you want to move it to a different Azure network.

    Please be aware that you CANNOT move from Entra join to Hybrid join using using this method. This will require a re-provisioning. You can however move a Cloud PC from an Azure Network Connection (ANC) to a Microsoft hosted network and vice versa given that they are Entra ID joined. For Hybrid joined you can move them between different ANCs

    Supported move scenarios

    Given that our move scenario is supported, we can go a head and update our provisioning policy by navigating to Devices and Windows 365 and select the Provisioning policy. Then open the provisioning policy you want to update and select Edit on the General section.

    Scroll to down to the bottom and find the Join type details section.

    In this example I want to update the policy to use a Azure Network Connection instead of a Microsoft hosted network. But you can just as well update to another region if you are using Microsoft hosted networks, or update to another ANC.

    When I’m done I click Next then Update on the bottom of the screen.

    We once again select the “Apply this configuration” option, but we select the Region or Azure network connection option.

    As you can see, we have the option to either update ALL Cloud PCs related to this policy or we can update selected devices. If you select the bottom one (to update selected devices), you will get the option to select which devices when you press Apply.

    PLEASE BE AWARE that this action will disconnect and shutdown the Cloud PCs fot the end-users, so it’s a good idea to do this change in a controlled manner and make user aware of that the change will happen before you click apply. It’s a good idea to do this during a weekend or other time frame when users are not expected to use these machines.

    Intune will give you a notification that the process has started, and this process will take a several hours to complete.

    Take away

    Using these features, you can update your Cloud PC configuration to some extent if you e.g. didn’t enable SSO when you initially configured your device.

    It’s also great to optimize the use of regions and move users between networks for different reason.

    But as I mentioned, we cannot move from Hybrid join to Entra join using these features. For that scenario a full reprovisioning is needed for the Cloud PC since the join type cannot be changed in a easy way.

  • How to enable Recall and Click to do on a Copilot+ PC

    How to enable Recall and Click to do on a Copilot+ PC

    If you have a Copilot+ PC and you are running Windows Insider, you can now enable Recall.

    If you have totally missed what Recall is, the short story is that it’s a way to back-track what you have done earlier and move back to snapshots of your workdays to find things for example.

    Recall requires that you have Copilot+ PC, otherwise this is not available. So, if you don’t have a Copilot+ PC, you don’t have to worry about users getting this.

    Also, Recall is not enabled by default and on a managed PC, you as an admin need to enable it with e.g. Microsoft Intune for the users to even be able to opt-in. This also goes for the Click to Do feature.

    Enable Recall

    To enable Recall on the device, you need to set a policy using GPO or MDM policies. Since my go-to tool is Microsoft Intune, let’s dive into how to enable and control it.

    Head into the Microsoft Intune portal and navigate to Device – Windows -Configuration and create a new configuration profile. Select Windows 10 and later as platform and Settings catalog as profile type.

    Give your profile a good name based on your naming convention.

    Click the add settings button and search for “Windows AI”. Select all the settings you want to configure.

    There are a few settings you can set for Recall based on your needs.

    In this example I’ve let the OS define the storage and duration for my snapshots, but you can configure this based on your needs. You can also add exclusions for websites and applications if we need. I’ve added my blog and Teams as an example in the picture, but you can also skip this.

    Go thought the wizard and assign the policy toward the Copilot+ PCs you want to target.

    User experience

    Recall

    So how do you get started with Recall? Simply open the new Recall app in your start menu and authenticate with Windows Hello. The first time you start it, it will work a bit on some updates. This might take some time. Once that is done, you will be able to start using Recall.

    You can scroll back and forth on your timeline to go back and forth looking for what it was you wanted to find. Once you have found it, you can search the content of the snapshot or visit the app you had open. It even takes you to the exact spot you where in the app at the moment.

    Down in the taskbar, you will see a new Recall button. Once its active, it will be light blue, and will indicate if its paused or running. If you click the Recall icon, you will see some actions you can do, like pause Recall or filter the website/application you have opened.

    You can also go through settings and see some settings around Recall, such as storage or applications and website you want to filter (if you want to add some additional ones as a user which your admin did not add).

    Click to Do

    The second thing which get activated with Recall is Click to Do. This feature gives you the same posibilities as in your snapshot, you can search the whole screen for things or open it in specific apps. You can also have it summerizing long text or create a list. There are a bunch of actions here!

    To activate Click to Do, simple press the Window-button on your keyboard and click the screen!

    Key take aways

    I really think Recall anbd Click to Do are two great ways of improving the user experiance and taking advanatge of the NPU and AI functionallity in a Copilot+ PC. As of this blog post being written, this is still a preview feature and things might change when this is released in GA.

    I still think it’s a great way to explore how you can use Recall, and find out what limitaitons you need to set for your users. So as always, Windows Insider gives you a sneak peak of what’s to come and something you really should make use of.

    What I do want to point out is that all snapshots are processed and stored locally, protected by Windows Hello to limit unauthorized access to your snapshots. Even if they are protected, it could however be a good idea to think about what sites you should add to a filter.

  • Moving to cloud native

    Moving to cloud native

    Let’s imagine for a second that you are a large, global organization and you are managing the fleet of PCs.

    In a traditional setup you probably have a Configuration Manager server and probably a bunch of distribution points.

    On top of this, you each month must distribute security updates to all your global device estate. And make sure your golden image is patched. Not only this, you also need to maintain your infrastructure, keeping Configuration Manager up to date, the server it runs on and also all those distribution points. Not to forget troubleshooting when a distribution point stops and a region +8 hours from your time zone can’t PXE-boot computers.

    You have all heard the marketing pitch because cloud native is the future. But if we instead take an approach to discuss this from a business and operations perspective, we can find some other interesting angles.

    Background

    What I do in my professional life is mostly to advise and help customer moving to a cloud native platform for device management. I’ve been working with Microsoft Intune since 2013, so I’ve seen all the itterations of the platform. I’ve also seen what works and what didn’t work.

    Back in 2013, going cloud native was not a thing, even though Windows 8 acutally supported MDM enrollment. Back then we were more talking full management or light management. Intune was the light managed way doing things since there were simply not yet feature parity.

    Windows 10 brought a whole lot of new benefits to cloud. You could now argue that you could make the shift to Intune only and onboard using the new cool Windows Autopilot.

    Fast forward to 2025 and Windows 11. We now have feature parity in MDM polices vs GPOs (even if it’s not a 1:1 translation), and moving to the cloud is something everyone is talking about. Not everyone has moved, but from what you hear peers, customers and people within the community everyone is looking at “how should we do the transition”.

    Moving to cloud native is not only a “keeping up with the IT landscape”. It can also be a huge cost save for a lot of organizations. No more servers, no more imageing, no more maintaining images. It’s simply just more streamlined.

    Common pitfalls

    There are A LOT of pitfalls out there when it comes to moving to Intune. I thought I would cover a few which I tend to see more often. Not all of these are technical. Because to be 100% honest, the technology isn’t the biggest issue here.

    Doing things like we have always done

    Moving to cloud native means doing things in a new way. I’ve seen way to many attempts at moving to cloud native which fails because you don’t embrace change. An Entra ID/Intune managed device is not exactly the same as a Active Directory/ConfigMgr managed device. Gone are the days of imaging and GPupdate, we now have Windows Autopilot and syncing with Intune.

    Cloud native will mean that we will have to do things different, and it’s not bad. Just different. Many things we have done for the last 30 years with managing devices (yes, the first version of ConfigMgr called SMS 1.0 was release over 30 years ago in 1994).

    We need to embrace change and adopt the new ways of working. If we don’t do that, we will never reach all the way. This is where many project fails.

    Doing everything at once

    The cloud journey looks very different for all companies, even though we want to accomplish the same things. But doing big shift actually impacts user productivity and we need to be smart of what changes we introduce.

    Looking at Sweden, a lot of companies are combining their Windows 11 migrations project with a Cloud Native project. This is a great idea since we are doing a big shift in the client anyway. However, time is running out for Windows 10, so today we need to prioritize whats actually important.

    But splitting the cloud journey into smaller pieaces could be easier for many, but we can run a lot of these projects in parallel.

    Migrating everything

    Think about all your GPOs. You have built that over a larger number of years, probably mostly adding to it and never really done a cleanup. A lot of these policies might been configured for Windows 7, and operating system which was released in 2009. You probably don’t need to migrate those settings to your brand new Windows 11 platform since a lot does not apply in the cloud and many are even depricated.

    There is really no point in walking through each and everyone of your old setting, trying to find the Intune equalent for it. A much better idea is to look at what you had, implement either the Microsoft Security Baseline or the Open Intune Baseline. Then go look at your old environment or your security requirements and look for what is missing and what makes sense. There is a GPO analytics tool in Intune, but for experience I would say that starting over is a much better idea since you will leave all your Windows 7 and Windows XP settings behind!

    Setting the bar way to high

    One of the most common things I see when working with customers who are moving from ConfigMgr is like I mentioned, we don’t embrace change. But one more things is thinking that we need to make it perfect in our first Proof of Concept or Pilot, which isn’t really a realistic approach. You need to start somewhere, so find your minimum viable product (MVP). What do we need to have inplace to do a successfull pilot. What I’ve seen with the more successfull projects I’ve been involed in, this has been the MVP:

    • Windows Autopilot for onboarding
    • Security baseline
    • Wi-Fi
    • VPN
    • Base applications (the crucial ones for your pilot group)
    • Compliance policies

    One more thing to keep in mind when moving towards a cloud native client is that your pilot and initial rollout might not need to suite 100% of your users. You will have some more cumbersome scenarios like dependency on on-premises or problematic applications. Don’t let this stop you, instead have them in a later phase of your project. Put them on hold, just like you would do with Windows feature updates. Once you have completed your first scenario, move on to the next!

    Moving all extisting devices

    This is a controversial one. Eventhough it’s nice to have all your devices as cloud native, but the only way to migrate devices from hybrid to cloud native in a supported way is by resetting the device. And this might not be the most productive way of making this shift, since it means actuall downtime for the end-user.

    Microsoft recommends to keep hybrid devices in hybrid until they needs to be reinstalled or replaced. Since we can still move to a 100% Intune managed environment with hybrid devices, this could for larger organizations be a more cost efficient way of making the shift to Intune. Re-installting thousands of devices is time consuming.
    I’m not saying that you shouldn’t make the hard cut and re-install all your devices, but be aware of that there are alternatives eventhough it’s not a pure cloude native solution for all your exisiting devices going down this route.

    What’s your first action?

    But where should you get started? Well, making sure you have co-management/cloud attach enabled in Configuration Manager is a great first step, to enable the shift of workloads to the cloud.

    I would also recommend to start looking at setting up a small proof of concept or pilot in Intune, onboarding a few devices with the base applications and a first version of security baseline (use the Microsoft one or Open Intune Baseline mentioned earlier in the post). Register a few devices for Windows Autopilot manually and enroll them.

    Don’t make it to hard on your self, start small with the “simple” scenarios and let them test it. But set a strategy for this and make sure to track your progress and create a project of this. It’s a hard project to pull of as a line activity since there are a lot of moving parts, redesigning and new ways of working while you need to keep the light on for your production environment.

  • 5 reasons you should go cloud native with Windows 11

    5 reasons you should go cloud native with Windows 11

    Let’s talk about cloud-native management with Microsoft Intune and Windows 11 for a little while and dive into five reasons why you should make the move.

    In the endpoint management world, there are two major things we talk about right now: moving to Windows 11 (the deadline is getting closer and closer) and cloud-native.

    I’ve been an advocate for going cloud-native for about 10 years now, but it has changed names over the years from modern management, cloud-only, to cloud-native management.

    But let us first define what we mean by cloud-native.

    Definition

    By “cloud-native,” we mean a device that is 100% managed using cloud services, such as Microsoft Intune. We are not doing hybrid join; we are utilizing Entra ID (previously known as Azure AD). This means that we DO NOT have the computer object in the on-premises AD, and we need to use modern ways to authenticate. In a true cloud-native setup, we should not be reliant on any on-premises resources, but if we look at reality, we will most typically see that we have some connector for, e.g., certificates using SCEP/NDES.

    For cloud-native device management, we don’t need to consider where the user has their primary source, whether that is Entra ID or Active Directory. So if you want to go cloud-native, you don’t need to move your master data to Entra ID, but you need to make sure that you have your users in Entra ID (which you probably already have if you are using any Microsoft cloud services like Microsoft 365, Teams, or Intune).

    Reason #1 – Reduce complexity

    Managing IT infrastructure can often be a complex and time-consuming task. By leveraging cloud-native management with Microsoft Intune, organizations can streamline their processes and reduce the complexity associated with traditional IT management. This approach simplifies device provisioning, configuration, and maintenance, allowing IT teams to focus on more strategic initiatives.

    By moving to cloud-native device management, we can reduce the number of dependencies we have on our on-premises system, such as connectors for hybrid join. We can also reduce the total footprint for the service since we can decommission and repurpose servers previously used for, e.g., Configuration Manager services.

    Since we rely on a SaaS setup, we don’t need to think about keeping our management platform up to date; that will happen automatically on a weekly basis.

    Reason #2 – Increase security and compliance

    Security and compliance are critical concerns for any organization. Cloud-native management with Microsoft Intune provides robust security features and compliance tools that help protect sensitive data and ensure adherence to regulatory requirements. With advanced threat protection, automated policy enforcement, and real-time monitoring, organizations can safeguard their IT environment against potential threats.

    Since we have our management tool in the cloud, this also means that our devices do not have to “call home” to be able to talk to our services. Since Microsoft Intune talks through the internet, we can make sure that the users have the latest updates and security configurations regardless of whether they are working in the office or remotely. We can also measure device compliance to make sure that the device lives up to our requirements before accessing corporate resources.

    Reason #3 – Adopt to an ever-changing IT landscape

    The IT landscape is constantly evolving, and organizations need to be agile to keep up with these changes. Cloud-native management with Microsoft Intune enables businesses to quickly adapt to new technologies, software updates, and changing user needs. This flexibility ensures that organizations remain competitive and can efficiently respond to emerging trends and challenges.

    Utilizing cloud services for management means that you do not need to think about keeping your device management tool up to date; that is kept up to date for you since Microsoft Intune is a SaaS offering. This will make sure you get the latest features and tools faster, without needing to plan for maintenance windows. You can also more easily make sure to provide your users with the latest tools by utilizing faster and automated deployment flows for applications and the latest updates.

    Reason #4 – Improve user satisfaction

    User satisfaction is a key factor in the success of any IT initiative. Cloud-native management with Microsoft Intune enhances the user experience by providing seamless access to applications and resources, regardless of the device or location. With intuitive self-service options and consistent performance, users can enjoy a more productive and satisfying work experience.

    We should not forget about one of the most crucial elements of device management: the person who uses the device, the end-user.

    Hearing people complain about their work computer not working like they are expecting is outdated. You can remove the need to be at the office for updates or having to download applications through VPN. Using cloud-native device management, you can fully support the hybrid workplace, providing an excellent end-user experience regardless of whether the user is working at the office, from home, or in any other location.

    Reason #5 – Enhance scalability and flexibility

    With cloud-native management, organizations can easily scale their IT infrastructure up or down based on demand. This flexibility ensures that resources are used efficiently, and it allows businesses to quickly adapt to changing needs without significant downtime or additional costs.

    No need to think about if you need to scale up or down, outside of licenses. This means that your environment grows without, and all you need to do is make sure you have enough licenses. This frees up a lot of time for your system administrators who would otherwise also need to plan for scaling up or down based on what happens in your organization. This will also make it easier to grow at a lower cost since we do not need to think about setting up infrastructure in that new branch office on the other side of the world. All you need are licenses for your new users, and you are ready to go!

    Closing reflections

    I’ve been pushing for going cloud-native for almost the last 10 years, and I still strongly believe that this is the future for endpoint management. So far, I’ve helped a lot of larger companies make the shift, and it works really well. Sure, there are hiccups initially, but that goes for all new services, and we need to adapt the way we work as IT admins to make this a successful transformation. We cannot bring our old ways of doing things; we need to adapt to our new tools. As long as we try to work the old way with a new tool that was not built for doing it the same, it will be an uphill battle.

    But if we can see the new possibilities with cloud-native and what it brings us, things will get easier. And it’s a moving target. Microsoft Intune has developed tremendously over the last couple of years, and we will probably see even more improvements as we go.

    I will leave you with an interesting reflection I’ve made. Larger enterprises, at least in Sweden, are more keen on moving to cloud-native than smaller organizations. Sure, the IT organization of a large enterprise can take on a larger workload making the move, but the small IT organizations would benefit just as much from the lower running cost of being cloud-native.

  • Hide the shutdown button in Windows 365 after update to Win 11 24h2

    Hide the shutdown button in Windows 365 after update to Win 11 24h2

    Some of you might have noticed that when updating a Windows 365 Cloud PC to Windows 11 24H2, the shutdown button appears out of nowhere in the start menu, which can cause some weird behavior for the end-users.

    Shutting down the Cloud PC isn’t really anything you should be bothered with. Restarting, yes, but if you do a shutdown, it will boot back up again within a few minutes.

    With the Windows 11 24H2 update to Windows 365, if you upgrade from an earlier Windows 11 version, this registry value will be reset.

    While I still encourage you to provide feedback to Microsoft, the fix for this problem is fairly simple!

    There are two ways we could go about addressing this. We could either create a configuration using the Settings Catalog or use proactive remediation. We will get the same result in the end, so it depends on how you like to do it. I will show you both ways in this blog post, and how you can configure it.

    Settings catalog

    In Microsoft Intune, head into Devices > Windows > Configuration and create a new configuration profile by clicking “+ Create“. Select Settings catalog as the profile type and click create.

    Give the profile a good name which makes sense in your environment.

    Search for “Start” and find “Hide Shutdown” in the list, then check the checkbox next to it. Close the fly-out.

    Make sure to enable the setting before moving to the next step.

    In my case, I will skip scope tags and move straight to Assignments, where I select “All devices” and filter out Windows 365 with a filter.

    Last step is to review and create the policy. And then you just need to wait for the policy to apply.

    Proactive remediation

    The scripts

    The easiest way to deploy a scripted solution for this is to use remediation, since then we can also get feedback on how many devices had this issue. We can have it continuously checking or just run once.

    But in order to set up a remediation, we need a detection and a remediation script (you could run everything in the detection script, but you won’t get any feedback if you want to run it more than once).

    You can find the scripts either on my GitHub repository or just copy them from here.

    Detection script

    # Created by Ola Ström, olastrom.com
    # Date: 2025-01-21
    # Version: 1.0
    
    # PowerShell script to update the registry value
    
    # Define the registry path and value
    $registryPath = "HKLM:\SOFTWARE\Microsoft\PolicyManager\default\Start\HideShutDown"
    $valueName = "value"
    
    # Check the current value
    $currentValue = (Get-ItemProperty -Path $registryPath -Name $valueName).$valueName
    
    # Check the value and set the appropriate exit code
    if ($currentValue -eq 1) {
        Write-Output "Registry value is set to 1."
        exit 0
    } else {
        Write-Output "Registry value is not set to 1."
        exit 1
    }

    Remediation script

    # Created by Ola Ström, olastrom.com
    # Date: 2025-01-21
    # Version: 1.0
    
    # PowerShell script to update the registry value
    $registryPath = "HKLM:\SOFTWARE\Microsoft\PolicyManager\default\Start\HideShutDown"
    $registryName = "value"
    $registryValue = 1
    
    # Set the registry value
    Set-ItemProperty -Path $registryPath -Name $registryName -Value $registryValue
    
    Write-Output "Registry value updated successfully."

    Intune part

    In Microsoft Intune, navigate to Devices > Scirpts and remediations.

    Select “+ Create” in the ribbon and give your remedation a good name, then press next.

    Now we will add the detection and remediation scripts, which you need to save as PowerShell scripts on your device to upload to Microsoft Intune. Change the “Run script in 64-bit PowerShell” to yes, but leave all the other options at their default values and press next.

    On the Assignment tab, select your target group. I’m using “All devices” with a filter for Windows 365.

    On this step, you also set the schedule by pressing on the text “Daily”, which is the default value. You can then choose if you want it to run once, hourly, or daily.

    When you have selected your schedule, press next to review your settings before pressing create.

    And now we wait until the remedation runs…

    Monitoring the remediation

    You can follow up the progress of your remediation by checking the device status on the remediation you just created.

    In this view, you can follow up on individual devices and see how many devices were affected.

    If the script detects that the value is set to anything other than “1”, it will run the script to fix it, and you can see here if the issue was fixed or not. This is not dependent on whether the script runs on a schedule or just once; you will still get feedback if any issues were found.

    What happens on the Cloud PC?

    Both ways will give the same end result for the end-user: the shutdown button will disappear, removing the option to shut down the Cloud PC (which is good).

    Take aways

    I’m not saying that one way or the other is the correct way; it’s just different ways to address the problem. Both of them have advantages, where the settings catalog will set the value and always keep it that way, and the remediation will check if the value is incorrect and change it if needed.

    You can also reuse this script for other registry entries you would like to change, so feel free to reuse it!

  • Master the Copilot button on Copilot+ PCs

    Master the Copilot button on Copilot+ PCs

    As you might know, there is a new category of PCs out there called Copilot+ PCs. These are defined by primarily two things, they have an NPU with over 40 TOPS (trillion operations per second), and they have the Copilot button on the keyboard. Of course they also run Windows 11.

    As per writing this blogpost, we have mainly seen ARM based Copilot+ PCs. But x86 based versions from AMD and Intel is around the corner!

    One thing that has gain a lot of attention is the Copilot button. When the first devices were released this opened the consumer version of Copilot, the Microsoft Copilot app. This app does not work corporate environment, since we don’t get the “correct” version of Copilot. The Copilot we want to use is the Microsoft 365 Copilot where you sign in with your corporate credentials.

    There has been changes

    Since the October patches 2024, Microsoft has altered the behavior of the Copilot button based how you sign into your computer.

    Another change that has happened is that the Copilot in Windows (preview) experience has been removed and is replaced by either Microsoft Copilot app or Microsoft 365 app based on your scenario (see the table below).

    The following table will show you that based on you you authenticated onto you computer, different things will happen.

    ConfigurationCopilot experienceCopilot key invokes
    Copilot not enabled in environmentNeither Copilot in Windows (preview) nor the Microsoft Copilot app are present.Windows Search
    Copilot enabled + do not authenticate with Microsoft EntraCopilot in Windows (preview) is removed and replaced by the Microsoft Copilot app, which is not pinned to the taskbar unless you elect to do so.Microsoft Copilot app
    Copilot enabled + authenticate with Microsoft Entra + new deviceCopilot in Windows (preview) is not present. Microsoft Copilot is accessed through the Microsoft 365 app (after post-setup update).Microsoft Copilot within the Microsoft 365 app (after post-setup update).
    Copilot enabled + authenticate with Microsoft Entra + existing deviceCopilot in Windows (preview) is removed. Existing users with Copilot enabled on their devices will still see the Microsoft Copilot app.IT admins should use policy to remap the Copilot key to the Microsoft 365 app, or prompt users to choose.
    Source: Updated Windows and Microsoft Copilot experience | Microsoft Learn

    In a corporate world, we strive to have the Microsoft 365 app launching when pressing the Copilot button on the keyboard, since that’s where we can use the Microsoft 365 Copilot. So let’s walk though the different scenarios.

    New Copilot+ PCs

    If you are setting up a new Copilot+ PC (or resetting an existing one), there isn’t that much you need to do. As long as you get the October 2024 monthly security update installed, the Copilot button will remap to the Microsoft 365 app if signed in with an Microsoft Entra account and you have Copilot enabled in your environment, and it doesn’t need to be the “fancy” $30 per month version. If you have disabled Copilot, the button will (as the table says) open Windows ´Search instead.

    Existing Copilot+ PCs

    For your existing Copilot+ PCs which were setup prior to the release of the October 2024 monthly security update, you as an admin have to take action since the default value for users would be to launch the Microsoft Copilot app. This can be done in two ways, either prompt the users to make the change them self in Settings or push out a new configuration for the computers using a GPO or Intune CSP policy.

    Setting
    CSP./User/Vendor/MSFT/Policy/Config/WindowsAI/SetCopilotHardwareKey
    Group policyUser Configuration > Administrative Templates > Windows Components > Windows Copilot > Set Copilot Hardware Key
    Source: Updated Windows and Microsoft Copilot experience | Microsoft Learn

    As of the latest service release of Microsoft Intune, you can now also do this usign Setting catalog, which is not yet reflected in the Microsoft documentation.

    Let’s have a look at how we set this up in Microsoft Intune. (UPDATED with settings catalog instructions)

    Navigate to the Microsoft Intune Admin Center and select Devices > Windows > Configuration and create a new policy. Select Windows 10 and later then Settings Catalog. Select it and click “Create“.

    We start by giving the new profile a name which makes sense in our environment. Then click Next.

    Next step is to add the setting by pressing +Add setting. Search for Windows AI and select the “Set Copilot Hardware Key (user)” setting.

    Close the flyout and enter the AUMID for the Microsoft 365 app.

    AUMID: Microsoft.MicrosoftOfficeHub_8wekyb3d8bbwe!Microsoft.MicrosoftOfficeHub

    If you are not using Copilot and want to disable the button, set the value to 0 instead of the AUMID of the Microsoft 365 app.

    Click though the wizard and assign the profile to an applicable group.

    Review your configuration before creating.

    We have now successfully changed the behavior of the Copilot button on our Copilot+ PCs!