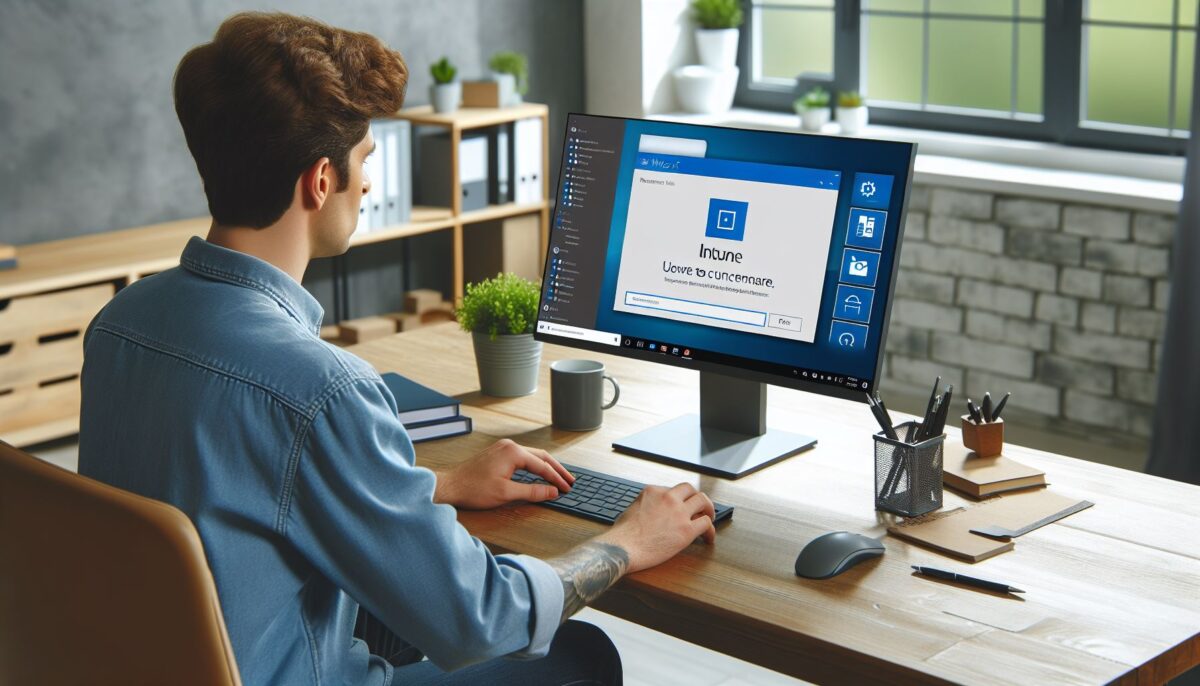
I thought I would share a few things you might not know that you are able to do in Intune, small things that might not be related to device management itself but you might not be aware off!
As all of you know, Microsoft Intune is constantly changing, there are news and updates each week. This means that some of these things might change in the future, who knows!
But let’s kick it off. Here are 5 things you didnt know you could do in Intune.
Change language and region
You have probably seen the settings icon in the top of the Intune portal, this is where you can access the portal settings.
When you click the settings icon, you will be taken to the Portal settings pane of Microsoft Intune.
As you can see, there are a lot of different things you can modify and control. E.g. if you have multiple directories or subscriptions you can change which your default is. This is also where you enable darkmode (if you are like me and prefer darkmode). But I though we would focus on the language settings.
If we navigate to the “Language + region” pane, we can select which language we want the portal to be in. This settings is not a global setting, this only affect my session. Like many others, I prefer to use the English version of MS Intune (the translations in Swedish are a bit wild some times), but I still want my regional format to be Swedish. I can easily select my preferences here and just hit apply and it will refresh the session with a new language for me.
If you are familiar with Azure or Entra, this works the same way!
Modify the left side menu
We probably all know and love the left side navigation menu, this is where we can select if we want to access devices or apps for example.
But did you know you can customize this menu?
If you navigate to “All services“, you will see a table of all the available services within Microsoft Intune, and if you look closely you will notice that there is a small star next to each service.
By default today, all is marked except for “Surface Management Portal” and if you want easy access to that you can simply just star that one too and it will show up in the navigation menu.
But let’s say I’m only interested in seeing devices, apps and groups, I can simply just mark them with a star and they will be the only one displayed in the navigation menu alongside with reports which we cannot remove.
One other neat feature is that you can rearrange the order of the navigation menu by simply dragging the headings around if you want to sort the differently.
Easily change between accounts
If you are using multiple accounts in Microsoft Intune, there is a simple way to just change which account you are using. If you have ever worked in the Azure portal, this is the same functionality.
Simply click your profile picture in the top right corner and sign in with a diffetent user. When you have signed in with an additional user, you can easily just switch by selecting that account.
Access the PIM portal
For most administrational roles, you use Microsoft Entra Priviledge Identity Management, or simply PIM, to grant the priviledged role that you will use in order for your account not to have that role all the time.
This can be setup in many different ways, and you can even PIM Intune roles if you use group feature.
However, you don’t need to go through the Entra portal to access your PIM roles. Simply navigate to Tenant Administration > Microsoft Entra Privileged Identity Management and you will reach the same portal.
From here, you can simply activate your roles, or approve other requests.
Shortcut to the Entra portal
Last but not least, when we are on the topic of Microsoft Entra. Did you know that there is a shortcut to the Entra portal in Intune?
Just navigate to All services in the navigation menu, and under “Other consoles” you will find Microsoft Entra.
When you click that link, a new tab will open with the Entra portal!
Okay, something that has been around in Microsoft Intune for quite some time is Scope tags. You know that step before assignment when creating a policy or profile?
In this post, I was thinking we would talk through what it is and what you can use it for since it’s a quite power full tool and very useful if you are working in larger environments and want to delegate rights since you can combine it with the Intune roles to really have a granular setup when it comes to who can do what. If you want to read more about the Intune RBAC setup, have a look at this post I wrote a few years ago called RBAC in Intune- Who does what at the zoo.
What is even scope tags?
Scope tags is not something you use by itself, it is connected to the Intune RBAC setup, since you can control what you different administrators can see and do.
If I have a scope tag called Sweden which I use on my policies, I can create an Intune role granting only permission to see and administrate things related to that scope.
This means that I can grant access to only certain parts of Intune for my administrators, delegating the responsibility to the Swedish organisation to manage Sweden while Norway and Iceland only can manage their things.
How ever, this only applies to Intune roles, so if you use an EntraID role granting more access, like the Intune Administrator role, scopetags are not part of the solution.
In general, it’s a good idea NOT to use the Intune administrator for all your administrators since this is a very powerfull administrator role also outside Intune. It is the Global Admin of Intune almost (but not as power full).
Setting up Scope tags
To use scope tags, you need to define them which you do by navigating to Tenant Admin – Roles and select Scope tags. You will see that you have one default scope tag, but you can add more in here.
To create a Scope tag, you simply press “+ Create” and we will give our scope tag name, which will be the one used in the portal. We can also add a comment explaining what this scope tag is used for which can be a good idea. When done, click Next.
In the assignment step, we will add a group which contains all out Swedish devices. There are a lot of different ways you could set this group up given that you want to not only catch the Windows devices, you would also probably like to see their mobile devices. In this example, I have a dynamic group looking for all Windows devices tagged with the Autopilot group tag “SE” using this dynamic membership rule.
When I’ve added my group I will click Next to get to the last step in the scopetag creation.
On the last step you can review your settings before creating it. If everything looks like you want it to, click Create and your scope tag will be created.
Repeat this step for all the scope tags you need, as you can see in my lab I currently have 3 scope tags and the default one.
Using scope tags for roles in Intune
Now that we have create our scope tags, we can add them to a role in Intune as a first step.
Head into Tenant Admin – Roles and select “All roles“. Then find the role that you want to configure, we will use the “Help Desk Operator” as an example.
Click on the name of the role to configure it and you want to head into “Assignments” which is where we define who has this role.
In here, we will click on “+ Assign” to add a new assignment. Since we are setting this up for the Swedish help desk, we will call this “Sweden“. Click Next.
On the next step we will add the group of Swedish help desk operators by clicking on “Add group” and selecting our Help desk Sweden user group. Click Next.
Next step is to add the scope groups, which devices and user we want to be able to manage. This means that we can limit this even further. For now, we will select all users and all devices and click Next.
In the next and last configuration step we will select what scope tag this Help Desk Operator is allowed operate with, meaning what devices and other object can it interact with. In this step we will select our Sweden scope tag and click Next.
As usual, before creating the role assignment you can review you options. Then click Create.
How does it look for my Help Desk Operator in Sweden?
So, what does things now look like for my Swedish help desk operator which we can call Moltas? Well, Moltas can only see things which has the scope tag Sweden. He can see all user and all groups, but he can only see two devices in the environment, since these are part of the scope tag Sweden.
If we compare this to a user with the Intune administrator role, you can see that the view is limited in the amount of devices.
If we take a look at one of the devices Moltas can see, we can actually see that it automatciallu got the scope tag Sweden since it’s a part of the “All Sweden device” group mentioned further up in the post.
We can also add scope tags to profiles that we create, making it possible to grant permission to e.g. one business area to manage their on profiles, applications and so on.
Since I’ve added the scope tag to this profile, Moltas will be able to see this one but not the rest of my profiles, but given his role he will not be able to do any modifications to this profile (Help Desk Oprator does not allow that).
Worth mentioning is also that if this administrator would have the rights to create objects, all their objects would have the scope tag Sweden.
Key take aways
Using scope tags and combinding it with the Intune roles makes it really easy and power full to delegate access to local administrator or different business units to operate their own settings in a bigger tenant. You can e.g. make sure that the local IT support in Sweden cannot see or touch the Norweigan devices.
I really like this feature, and it’s really convinient in larger environments. You can off course limit the access even further by not granting access to all users and all devices, limiting it even further.
If you are, just like me, a BIG Windows 365 fan you probably haven’t missed the news around Windows 365 Boot. There was an update released in the end of January which enabled what is called Windows 365 Boot Dedicated mode and Windows 365 Boot Shared mode.
There are a lot of awesome posts out there how to configure these, like these to from my fellow Windows 365 MVP Dominiek Verham, which I really recommend you to check out!
Two really awesome posts about how to get started.
But why should you use it and why should we pay attention to this?
In this post, I’ll discuss a little around my view on why these to features will play a crutial part in the Windows 365 journey and the future of Windows. These
And also let’s adress the elephant in the room. Windows 365 Boot is basically Microsofts take on thing clients on Windows. This has been done before by others, but never using the standard management tools. I think that is one of the key things with Windows 365 Boot, we manage a regular Windows installation with Microsoft Intune.
Windows 365 Boot Dedicated mode
Lets start of with what it is.
Windows 365 Boot Dedicated mode is a new Windows 365 feature which enables you to have a PC which is using Windows 365 Boot that is, just like the name says, is dedicated to one user. Right now, this feature is in public preview.
Previosuly when we have looked at Windows 365 Boot, you have not had a user assigned to the machine which meant that using passwordless solutions like e.g. Windows Hello for Business was not possible.
Now with Windows 365 Dedicated mode, I can have my PC setup as a Windows 365 machine and each time I sign in to my computer I will end up in my Cloud PC session using Windows Hello for Business.
This opens for a lot of new cool scenarios which we could do and I think this might be the bigger and maybe a scenario which is harder for many to related to. We are so used to having our “own” computer locally, and maybe connect out to a virtual session when ever we need to switch context to a different environment or such. This would make your primary device a cloud based computer, which in my world is kind of awesome.
Some scenarios I can think of top of mind where this could be usefull are:
Extend life of older hardware
Upgrade a PC to a higher spec without needing to have physcal access to the device
Provide cheaper hardware for certain scenarios
Ensure data is not lost when using devices in more extreme environments (hardware failure)
One kind of weird scenario that came to mind was also that you could by your self also switch between computers, by selecting in the Windows 365 web portal which device to connect to. This means that you could for extended times work from one typ och device, and then easliy change this through the webportal.
Why should we care?
To be honest, I think this scenario could potenitally be a hard sell to IT people, since we are very used to working with out operating system locally. The host machine would still require to run Windows 11, but you would never really see it and you would still need to patch the OS on a regular basis.
I think the biggest selling point here is that if you go with a Cloud PC in this way, you will always run on “hardware” which is preforming. No need to wory about disk crashes, slowness or anything like that. You will also gain insane traffic thorugh put, since your computer is not actually connected to your own network. It’s connected to the Microsoft network which is playing in a different legue when it comes to upload/download speeds then our usual home internet. This would actually benefit you if you work with a lot of large files, OneDrive and SharePoint syncs insanly fast. This is however a feature of Windows 365 as a service, not the dedicated mode.
In my mind, this is something we need to keep attention to how it develops, even if many of us are not ready to take the leap today. My bet is that THIS will be a big part of the future of Windows.
Windows 365 Boot Shared mode
Windows 365 Boot Shared mode is more like the Windows 365 Boot which went into GA last September, but with some updates. One of the major differences is that you can now add your company logo on the sign-in page to make it more relatable to your brand.
The concept behind this is to provide a shared workstation which many different users work from. Looking at different scenarios I’ve seen with customers, this could cover that “kiosk” computer in the break room in a workshop. Or maybe a good and simple way to provide a great experiance to personal working in a callcenter where you don’t have your own desk. And why not that sales station which is used by several people.
If you combine the Windows 365 Boot Shared mode with a Windows 365 Frontline license, you pretty much hit the sweet spot. Then you can sprinkle with a FIDO2 key (like Yubikey) and you even simplify the sign-in process and make it passwordless!
One big issue has always been “how do we provide a great experiance on a shared device”. Traiditionally, there has always been an issue with user profiles (if you have to many things break) but that can be addressed with the shared device policy in Microsoft Intune. However, you are still not giving a full computer experiance to the users, they are usually pretty limited and distributing applications is not as smooth as if you had a personal computer.
This would also mean that if you are working in a setup where you move around a lot, and maybe not always come back to the same computer, you can continue your work exactly where you left of but from a different computer.
Windows 365 Boot Shared mode gives you that personal experiance, but on a shared device.
Why should we care?
One thing that always seams to be a complex and tricky scenario to solve are those shared devices, especially if the user moves around a lot. Think clients of different sorts has always been a big thing here, but for many IT admins the thin clients means another tool to administrate in, instead of the tool they are spend most of their time in for managing the other devices. Using Windows 365 Boot we can leverage Microsoft Intune and bulding thin clients on Windows, by just deploying a set of policies from Microsoft Intune.
For many organization, intorducing a new management tool for thin clients is a little bit of a bump in the road since this means getting that tool approved, setup and educating the adminsitrators on how to use it if there is no pre-exisiting knowledge. It’s not necesserially a hard thing to learn a new tool, but it could slow down the implementation process for some organizations.
Key take aways
What I think we need to think about is that Windows as we know it is about to change, it won’t be over night but something is happening now. Imagine when we started seeinf Office 365 which later became Microsoft 365? That was a journey, and I think that right now we are seeing the start of this journey for Windows. I might be naive and sprinkled a little wishfull thinking over this whole thing, but I really think we will see a change over the next couple of years in what we think of as Windows and what we expect. Mind you, these are my personal thoughts and ideas.
However, the Windows 365 Boot features brings some really intersting things to the table. We can now easily deploy and manage thin clients without needing any additional tools or licenses. I think that is pretty sweet as someone who works with customers who hare heavily invested in the Microsoft echosystem. It might not be as far along and flexible as e.g. IGEL. But this would potentially get more companies started with thin clients since there really isn’t any roadblocks anymore like there used to.
Microsoft has now released all the parts they promised back in March of 2023. On the first of February, a lot of cool things saw the light of day without the preview label. We initially saw Endpoint Privilege Management and Remote Help as part of the Intune Suite, with Advanced Analytics, Cloud PKI, Enterprise App Management and Microsoft Tunnel for MAM.
In this post, we will focus on the Enterprise App Management feature which will help IT admins to keep their applications up to date by using a managed catalog of applications (much like SCAPMANN, PatchMyPC and such).
Before we begin. If you have never heard of the Intune Suite, it is a bundle of premium add-ons for Intune making it even more powerful by unlocking new functionality.
What is Enterprise App Management?
Enterprise App Management is a catalog of third-party applications, applications not developed by Microsoft, which is provided in a simple store-like manner in Intune. The catalog today consist of a little over 90 applications which are maintained by the Microsoft service, a list that will hopefully grow over time adding even more applications. The Enterprise App Management service takes care of both packaging the initial application but also managing any updates released fot the application, streamlining the work for the application team!
The concept behind this, is to ease the workload for application administrators not having to package all applications. The easiest way to position this is to think of it as a time saving tool, our packaging team won’t have to care about packaging the simpler applications which might be updated quite frequently. They can instead focus on the more unique and complex applications for the organisation.
Enterprise App Mangement comes in the Intune Suite bundle or can be purchased separately as a stand alone service. What is important to keep in mind here is to make sure you buy enough licenses to cover all your users since it’s licensed based on users in your environment.
How to get started?
Once you have made sure that you have the licenses for either the Intune Suite or Enterprise App Management (you can activate a 90 day trial in the licensing portal to test it out), you can use the new option in the App type for Windows in Microsoft Intune.
At the bottom you will see a new option, Enterprise App Catalog app, which is the Enterprise App Management service!
Once you have selected this as the app type, you will get a reminder that you need to obtain the correct licensing for the service.
When you add an application from the Enterprise App Catalog, it will be added as a Win32 app, but called Windows catalog app. To select your app, simply click “Search the Enterprise App Catalog“.
You will now see the full list of apps in a fly-out menu to the right where you can select the app you need.
In this example, we will select 7zip as the application we want to deploy. When we have chosen our app, we click “Next” at the bottom of the screen.
In the next step we can select which version of the app we need, for 7Zip there is only one version. Click “Select” at the bottom of the screen when you have chosen your version.
When we have chosen our application, the application information will be pre-populated. If you do not need to do any modifications to the app information, just click “Next” at the bottom of the screen.
You can now notice that the install- and uninstall command for the application has automatically been added, and also the return codes.
Next page is as always for Win32 apps the requirements where we can add any additional requirements we have identified. As you can see, the mandatory fields will be pre-populated and we can just move to the next step.
What I really like is that the service also add detections rules for the app. So just hit “Next” to move to the last step!
What is a bit different from adding your own applications is that you never add the assignments as part of this initial step. So last step is “Review and Create”. Once the application has been created, you will be able to add assignments to your app. Now click “Add app” to finish the process.
The app will now be created, which takes just a few seconds, not even enough time to go and refill that coffee cup you just finished!
Once the app has been added, you can add assignments just as any other app by going to Properties on the app and add your target groups.
Updating an application
Enterprise App Management is created to keep your applications updated. The service will utilize self-updating features of the applications where ever possible to minimize the effort from an admin side. If self-updating is enabled for the app, it will automatically be updated on the client.
If self-updating is not available for the app, a new version of the app will added with the needed superseedence relations for it to be replaced, mening that you will have both the new and the old version visible in Microsoft Intune.
Do you want to read more? Check out this Microsoft articles:
As everyone knows by now, Copilot is coming to Windows. For people in some parts of the world (e.g. USA) this is already a reality. But for us in Europe, we are still waiting for it to be made available.
I rarely write posts about how to disable things, I’m a fan of giving the power to the end-user to use the new awesome tools made available for them. But Copilot is a massive thing, and for many organizations this is both a legal/policy issue, and a technical readiness issue. We need to be able to provide our users with services in a controlled way.
Many of the larger organizations I’ve been working with over the years take this approach, enabling new services in a controlled way.
So, let’s look at how we can control this using Microsoft Intune. In this post, we will notdig into what Copilot for Windows is.
Creating a policy
As usual, my focus is on cloud solutions so we will look into how you can do this using Microsoft Intune and not GPOs.
Today, there is no Settings Catalog, so we need to rely on a Custom policy which we create by heading into the Device blade, choosing Windows > Configuration Profiles and select “+ Create” > “New policy“. Then we select Windows 10 and later as platform, and use Template > Custom as profile type.
As usual, start of by giving your profile a good name based on your naming convention.
Now, lets add a custom setting by pressing the “Add” button.
Add the following information to your custom entry:
Name: Disable Windows Copilot
Description:
OMA-URI: ./User/Vendor/MSFT/Policy/Config/WindowsAI/TurnOffWindowsCopilot
Data type: Integer
Value: 1
Should look something like this and then hit save at the bottom of the fly out.
You have now successfully added a custom CSR setting.
Hit Next at the bottom of the screen and assign your policy to a user/device group. As always, if you are doing this in production, start with a test group before going for broad deployment.
For this demo purpose, I’ve added the built in “All users” group.
Skip the “Applicability rules” and head to “Review + Create” and review your profile before creating it. Once the profile has been created, the waiting game starts for the policy to apply. As usual, you can speed this up by pressing “Sync” on any of your devices that will be targeted.
When the policy has been applied, the Copilot icon will be removed from the task bar.
Doing a controlled roll-out
We have currently removed Copilot for all the users in your environment, but how do we start enabling it again?
Well, we need to do two things:
Create a group for our allowed users/devices
Exclude them from the policy we just created
Since the default value for the Windows Copilot feature is to be enabled, we don’t really need to add a new policy. We can just exclude our targeted users/devices. This also makes broad deployment easy since we can gradually just exclude users/devices until we want to enable it for everyone.
Please be aware that the change is not instant, the device needs to check-in before the policy is updated (but it’s fast when you do a forced sync).
Take away
So, would we disable this for all users and do a controlled roll-out? Well new features are not always easy for end-users to gasp or even understand that they have. People within IT tend to always want the latest and greatest and be early adopters. But “real” end-users are not always like that. We need to make sure that we can get information out to our end-users about this awesome new feature.
There might also be that we need to do some assessments around the service before we can enable it in our environment, this could be both legal and internal policy that is controlling this.
But as always, I really encourage you to enable this for your end-users once it’s available in your region. For us in Europe, we will have to wait a bit longer, but looking at the recent announcements around a Copilot-button on all Windows keyboards, I think we can really tell where we are heading with this.
So please, don’t just disable this for the sake of disabling. And if you do disable it, have a plan to enable it. It will bring awesome value to your end-users (especially if you have Microsoft 365 Copilot licenses).
I actually ran into this working with a customer. We had setup the Cloud PCs using an Azure Vnet in connected to the wrong landing zone (test environment) and we had 100+ Cloud PCs up and running and there was no possibility due to internal processes to move that network to the production environment.
This could also be relevant if you want to move a provisioning policy from one Microsoft hosted network region to another.
In this post we will cover how this looks when using Microsoft hosted networks, but they could just as well be Azure Network Connections. The beauty is that we don’t need to re-provision them, we can just update the provisioning policy!
Update provisning profile
Since we are moving from one Microsoft hosted network to another, we won’t need to do any updates outside the provisioning policy. If we are moving to another Azure Network Connection, we need to first create a new connector for our new network. This could be in the same subscription but be another subnet for example. Once you have created this, you can move on to updating the provisning policy.
So, the first step is to head into our provisioning policy. In this example we are updating our policy which is currently set up to use US East as a the region, but we want to move this to Europe instead.
What we need to do here is to update the geography and region in our policy, and of course also the name since I have the region in my policy.
Once I’ve done my updates to the region, I simply click next to the bottom of the screen, and I end up on the summary page where I as always get an overview of my policy. When I’m done reviewing this, I click Update.
But we are not done yet. We also need to apply this update to our machines, unless we do that this only applies to newly provisioned Cloud PCs, and we want to move all of them to the EU.
When we are back on the overview blade for our policy, there is a action at the top called “Apply current configuration”.
When we click on this text, we get prompted whit this pop-up asking us if we want to apply the region change or the SSO change. Since we didn’t make any SSO changes in this policy, things would happen, but this is a fantastic way to enable SSO for all your Cloud PCs without having to redeploy them. But let’s select the “Apply region change” and hit Apply.
Once you have applied the change, your Cloud PCs will start updating.
During the update, the Cloud PC will not be available since work is being done in the back end.
Once the move has been completed, which took about 10-15 minutes for me, you can sign back into the Cloud PC and keep using it in the new region!
Like the swede I am, I’ve been off work for the last 4 weeks to get my summer vacation. I’ve actually done my best to try to stay away from IT stuff this summer, to disconnect and focus on other things (like golf and getting our house in order).
But the world of IT does not slow down just because of summer, so here is a summary of some of the highlights that I missed during my time off!
I got renewed as MVP
Okay, this I already knew before the summer. But I was awarded for my 2nd year as an MVP within Windows and Devices for IT. I’m truly honored to be awarded for yet another year and being part of such a cool community of awesome people!
I was picked to do two session at the WPNinja Summit in Baden, Switzerland, the 27th to 29th of September.
I will do one session about Windows 365 networks and one about how to do better deployments of Windows 365.
I’m really looking forward to this and I hope to see you all there!
Windows 365 Switch in public preview
At Microsoft Ignite 2022, Microsoft introduced three big new features coming to Windows 365. In May, Windows 365 Boot reached public preview as the first of the three. Now in August, the second and maybe my favorite, Windows 365 Switch reached public preview!
Windows 365 Switch lets you switch between your physical PC and your Cloud PC through the task viewer, just like the other desktops you can have. It’s a really cool feature and I will cover this in a blogpost the upcoming weeks!
This was actually announced before I left for summer vacation, but Windows 365 Frontline finally reached general availability!
For those of you not familiar with this concept, this is a different licensing modell designed for scenarios where the users are not using their device all the time, user who work in shift where you have users coming an going. The concept is that you buy one license, but you get three Cloud PCs but only one can be used at the time.
It sounds a little bit tricky, I know, but I covered this in an earlier blog post which you can have a look at.
Microsoft released new information about the Windows 11 23h2 update coming later this year. It is currently scheduled to be released in Q4 and will be released as an enablement package. This means that there are no big changes coming to the code base of Windows 11, and you can keep doing you testing on Windows 11 22h2 if you are still transitioning over to Windows 11.
Microsoft also mentions a Windows 11 LTSC version in this update, which means that if you are waiting for that release, you can start preparing.
As per usual, Microsoft Intune has gotten it’s weekly updates during the summer. I think the most impactful update was the fact that uninstalling applications as an end-user in Company Portal is FINNALLY available! I know this has been something a lot of IT Pros has been waiting for. There are also a lot of new stuff in the 2307 Service release.
Some highlights:
Uninstall Win32 and Microsoft store apps using the Windows Company Portal
Use the Turn off the Store application setting to disable end user access to Store apps, and allow managed Intune Store apps
New BitLocker profile for Intune’s endpoint security Disk encryption policy
Intune supports new Google Play Android Management API
Change to default settings when adding Windows PowerShell scripts
New settings available for the iOS/iPadOS web clip app type
Settings insight within Intune Security Baselines is generally available
Tamper protection support for Windows on Azure Virtual Desktop
Endpoint Privilege Management support to manage elevation rules for child processes
During the summer Microsoft updated how you can enable screen captrue protection and watermarks for Windows 365 (and Azure Virtual Desktop).
Previously, you had to upload a custom ADMX template to enable these settings (or GPO), but they have now been made available in the built-in ADMX profile in Intune, making this setting much more accessible.
During the summer, Microsoft also held their Inspire conference which is usually more targeted towards partners, but there was a lot of good stuff announced and shared during the conference.
Microsoft finally released the long-awaited Intune Suite, or as it is called in Intune “add-ons”.
But what is the Intune Suite and why should I even care? That’s what I’m set out to cover in this blog post, and we will take a look at what there is right now and what’s to come.
One major change happened when this was introduced, and that is how Intune is licensed. Or at least it got some new names. Microsoft Intune Plan 1 is what previously was just called Intune and is included in the Microsoft 365 and EMS plans. This will give you the core Intune features as you have been using them today (with some exceptions).
Then we have Microsoft Intune Plan 2 which are some add-ons to plan 1 including Microsoft Intune Tunnel for Mobile Application Management, which will give you an option to use Intune Tunnel together with your MAM enabled applications. And then we also have Microsoft Intune management of specialty devices, which enables you to manage specialty devices in Intune such as AR/VR devices, conference room meeting devices and large smart screen devices.
For Plan 1, there is also a possibility to buy Remote Help, Endpoint Privilege Management, Advanced Endpoint Analtics and the other upcoming features as standalone services to your Plan 1.
Intune Suite – premium features for Intune
The Intune Suite is a packaged deal which includes all the bells and whistles. You get Plan 1 and Plan 2, but also all the nice extra add-ons. Today, this list is quite limited since it will only get you Plan 2, MS Intune Tunnel for MAM and Remote Help on-top of your Plan 1 licens (which you got from your M365 license anyway). BUT, and this is the selling point, you will get all the upcoming features once they are released.
The two already released premium features (if we disregard the Plan 2 features), are by them self really good products. I’ve previously covered the Remote Help app which since then has been refined even further.
Microsoft has further announced that they will release Endpoint Privilege Management (which is currently in public preview) and Advanced Endpoint Analytics as a start, but there are more things coming which will make this suite even better!
Why should I consider this?
Should you consider the Microsoft Intune suite? Well, that depends on your needs. For some, it certanly makes sense to consider it given that they are interested in a lot of the listed features. For others, maybe just one is interesting which then makes more sense to buy as add-ons on it’s on rather than buying the whole suite.
I think, as of right now, Remote Help and the upcoming Endpoint Privilege Management is what will be most useful for many companies as it solves two major headaches: A remote support tool integrated to Intune and a first party solution to manage local administrator. There are a lot of other good tools out there to manage both remote support and local administrator but having a first party tool comes with advantages such as good integrations to Intune for e.g. reporting.
I will in feature post dig in more to the features of the Intune Suite, but for now we have set the scene!
Once every now and then you get one of those weird and maybe a bad ideas and ask yourself:
“What if I have a Windows 10 computer which cannot run Windows 11, but I really want to run Windows 11 on it in a supported way?“
That was what I asked myself when realizing my old Surface Laptop (first generation) does not support Windows 11.
Putting this in maybe a more real-life like scenario “we have some old hardware and Windows 365. We want to keep using the hardware for a few more years but run Windows 11” or something like that.
This gave me an idea. Can we create a kiosk that runs the Windows 365 app only on a managed Windows 10 computer? And to make it more special, let’s make it as a shared device so that I get MY Cloud PC and you get YOUR Cloud PC! 😊
Since Windows 365 Boot is not coming to Windows 10, we need another solution. This solution could be using kiosk mode and shared mode for Windows.
Pre-reqs
What do we need for this to work?
Intune managed Windows 10 computer
Computer registered for Windows Autopilot
Self-deploying deployment profile for Windows Autopilot
Shared device policy
Windows 365 license of some sort
All other licenses required to use Intune
The Remote Desktop application installed on a device
An Azure AD group containing out kiosk PCs
And that is about it.
My thought is to use the old school ShellLauncher method for this, not the fancy assigned app setup since we can make this more dynamic if we want to re-purpose this for another application. This means that we could also use Win32 applications and not only UWP apps.
Using the ShellLauncher method in Intune has gotten really easy, it’s just one custom policy and we are set.
Creating the ShellLauncher script
When looking around for a good source, and inspiration, for this setup I came across this post by Michael Niehaus which is really good and even provides a sample script we can use (why re-invent the wheel?).
Using the script example in the blog above, I came up with this script which you can download from my Github repo.
Basically, what you need to update, is the <Shell> section of this part to the path for your application (Win32) or the AUMID (UWP). In this case, the Windows 365 app for Windows 10 which is a UWP app (as stated in the V2:AppType attribute).
If the remote desktop session is closed, the application will restart.
Creating the ShellLauncher policy
For this, we need to create a custom policy in Intune.
First step is to go to Intune (https://endpoint.microsoft.com) and navigate to Devices > Windows > Configuration profiles and select “+ Create profile“. Select Windows 10 and later as platform, Template as profile type and then the Custom template.
Next, we will give our profile a good name so that we know what the profile does. This should be based on your name standard and naming convention for policies. Then hit next at the bottom of the window.
On the “Configuration settings” tab, select “Add” and give the configuration a name (e.g., ShellLauncher V2). As OMA-URI, enter:
./Device/Vendor/MSFT/AssignedAccess/ShellLauncher
As data type, select “String (XML file)” and upload your XML file. When this is completed, press Save at the bottom of the screen.
You will now see that your setting has been added as a row to this configuration setting and you can press Next at the bottom of the screen.
On the Assignment tab, select the group where you have put you targeted kiosk devices and press Next at the bottom of the screen.
You can skip the “Applicability rules” tab and jump straight to the “Review + create” tab to view a summary of your configuration.
Once you have reviewed your settings, you can press Create and your profile will be created.
Shared device policy
The other profile we need to create is a profile for Shared device. This is done by going to Devices > Windows > Configuration profiles and select “+ Create profile“. Select “Windows 10 and later” as platform, “Templates” as Profile type and find and select “Shared multi-user device” and click create.
Give your profile a name, I will call mine “Win365 Shared Kiosk“. When you have given your profile a name, press next.
On the Configuration settings tab, enable the Shared PC mode and add the settings you need based on your requirements. I will use Domain as Guest account type to ensure that only users from my organization will be allowed to sign in. I will also add some additional settings as you can see from the screen. When you have added your settings, hit next.
Assign your policy to the group you created and used for the ShellLauncher policy and press next.
On the last step, review your settings and click create!
Self-deploying enrollment profile
To have this as a zero-touch installation, which would require zero input from an IT person, we can use the self-deploying deployment profile in Windows Autopilot, which means that we need to create a new profile.
In Intune, head to Devices > Windows > Windows Enrollment > Deployment profiles and select “+ Create profile” and select Windows PC.
First step is as always to give you profile a name, I will call mine “Self deployed Kiosk” and then press next.
On the next tab, select “Self-Deploying (preview)” as Deployment mode. You will then see that almost all fields are grayed out. You can leave all values as default, or choose to change the Language, if keyboard should be automatically configured and if a name template should be used.
Notice: If you are to use this on a virtual machine, you will need to use the user-driver deployment mode since self-deploying requires physical hardware.
For this demo, I will leave everything set to default and press next.
The next step is to set assignments, we will select the Azure AD group we created for the policy for this, but you could also use another group. The important part is that the device is in this group.
Press next and you will end up on the review + create tab where you can review your settings before pressing create.
Once the profile is created, it will take around 15 minutes or so for the enrollment profile to be applied to your device, given that it’s not already included in another active assignment. If that is the case, you need to either add an exclusion group or remove it from the other group before the profile will be assigned.
If you navigate to Devices > Windows > Windows Enrollment > Devices you can look at your device and make sure the correct enrollment profile is assigned.
Deploying our kiosk
This is where the fun begins. Let’s deploy our kiosk to our device!
My device needed to be reset, since it’s already managed by Intune, I can simply just use the wipe command and the device will reset. Since I’ve already added it to the target group for my deployment profile, the enrollment will kick off automatically once the device has been reset. However, if you are connecting using Wi-Fi, you will need to select region, keyboard and Wi-Fi network.
Once the Windows Autopilot enrollment process has completed, my Windows 365 kiosk device is ready, and I can now only run the Windows 365 app on my device.
NOTICE!
There is a big flaw in this design at the moment, and that is the fact that we cannot deploy the W365 application during the ESP at this stage, this means that we need to ensure that the application is installed BEFORE we apply the kiosk profile. If and when we can install the application from the “new store” during ESP, this will not be an issue.
This means that we currently need to wait until the W365 app has been deployed before we assign our kiosk profile.
Okay let’s face it. The Windows 365 app is just ONE more app to consume our Windows 365 or Cloud PC. But it brings something to the table.
With the Remote Desktop app that we have all learned to connect to our Cloud PCs, AVDs or published apps. And it’s a great app, especially if you work as a consultant like I do and have multiple environments that you connect to, I connect to 2-3 different tenants on a weekly basis. But the Remote Desktop lacks key features when it comes to Windows 365.
If you have ever used Windows 365 through the browser, you know what I’m talking about. There is NO WAY to reboot, restore or troubleshoot a Cloud PC from within the Remote Desktop app, you can simply just connect to your session, and for anymore “advanced” user action you have had to rely on the browser.
Enter the Windows 365 application.
In the Windows 365 app you are able, as in the Remote Desktop app, to connect to your Cloud PCs which are connected to your signed in account. This is the caveat though. Only machines available for the signed in account are displayed, if you are running multiple accounts (like I do) you will have to switch accounts.
However, the features in the Windows 365 app make it worth it, since I can fully control my Cloud PC from within the app, and I don’t have to rely on the website to perform addition actions like I needed previously.
If you have ever used the Windows 365 website to connect to your Cloud PC, you will recognize this experience. The layout is familiar to the web, but you get all the benefits of using the app (like multiple monitors, smart sizing, and Teams optimizations), but you also get the user actions previously exclusive to the web portal.
Working with the Windows 365 app compared to the Remote Desktop app is for me as an end-user not really any different, other the account part mentioned earlier. But if you only use one account, like most are, you will never notice this difference.
You should really check out the new Windows 365 app which is in preview. You can find it on this link or if you search the Microsoft Store for Windows 365. But like always with preview things, be aware that it’s in preview!