Categories
Windows 365

Windows 365 Frontline – Getting started!

Windows 365 Frontline is still in public preview, but you can sign-up for the preview on this link! Since it’s still in preview, there is currently no information on pricing.

When you have gotten yourself licenses it’s time to configure, and since this is Windows 365 you do everything from Microsoft Intune.

One thing that differs the Frontline version from the Enterprise version is how licenses are assigned. For Enterprise you assign a license to a user to provision a Cloud PC, but for Frontline this works differently. You never assign the license to a user, and we will cover what you do instead further down in the post. It’s really clever!

Setting up a frontline Cloud PC

What you will need for this, except for the obvious Microsoft Intune and all its pre-requisites, is of course the Windows 365 Frontline license. This license gives you the right to provision 3 Cloud PCs per license. What you would typically also add to this is a Microsoft 365 F3 or E3/E5 license (or equivalent licensing) to gain all the features needed for managing and working with the digital workplace.

You will also need a few groups (Azure AD groups or synced on-premises AD groups) with the users you are providing with a Cloud PC, this could e.g., be your IT Service Desk team.

Once we have that in place, we can start configuring!

Head over to https://intune.microsoft.com and navigate to Devices > Windows 365 and select the “Provisioning policies” tab.

Click on the “+ Create policy” button to create your new Windows 365 Frontline provisioning policy.

On the “General” step, give your profile a good name and make sure to select Frontline as license type. Then select the join type you would like to use, followed by the network settings. For this example, we will user Azure AD join and Microsoft Hosted network, and we will place the Cloud PCs in Sweden Central. When done, click Next.

In the next step, we will select which image we will use. In this case, we will use the default value and just click Next.

In the next step, we will apply a custom naming convention to differentiate these from our regular Cloud PCs, but this is mostly for my own convenience, and you can leave this to default. We will also add these computers to Windows Autopatch since I have that active in my environment. When done, click the Next button.

In the next step, this is where the magic happens. Since you never assign licenses directly to a user you will need to add which groups should get Cloud PCs based on this policy, but also which license these groups should use. You can add multiple groups and have different machine sizes assigned to the separate groups. In this example, since I only have one license type, we will assign the same license to the same groups.

You will also be able to see how many Cloud PCs you have left to assign.

Once you have set up your groups and assigned the licenses to them, click on the Next button to review your settings before creating the policy. If everything is in order, click Create.

Monitor Cloud PC provisioning

Once you have created the provisioning policy and populated the assigned groups, your Windows 365 Frontline Cloud PCs will start to provision, and you can as always track this in the “All Cloud PCs” tab. What I’ve found is that I need to clear any filters applied before I can see the Frontline machines, so if you don’t see them just clear the filter.

Once the Cloud PCs are provisioned, they will get name based on what we set in the naming template part of the provisioning policy and your Windows 365 Frontline Cloud PCs are ready to use!

Connecting to Cloud PC Frontline

As with all other Cloud PCs, there are a few different ways to connect to your Cloud PC Frontline, but the preferred way should always be using the Windows 365 app since this provides the best end-user experience.

Once you sign in the to the Windows 365 application, you will see all your Cloud PCs listed. You will see both your assigned Enterprise and Frontline Cloud PCs. This will look similar in the Windows 365 web portal as well.

As you can see in the picture, the Cloud PC Frontline machines are tagged with the word “Frontline” which provides me as an end-user a great way to differentiate the two different versions from each other. As you can also see, I can have several Cloud PC Frontlines assigned to me based on different profiles.

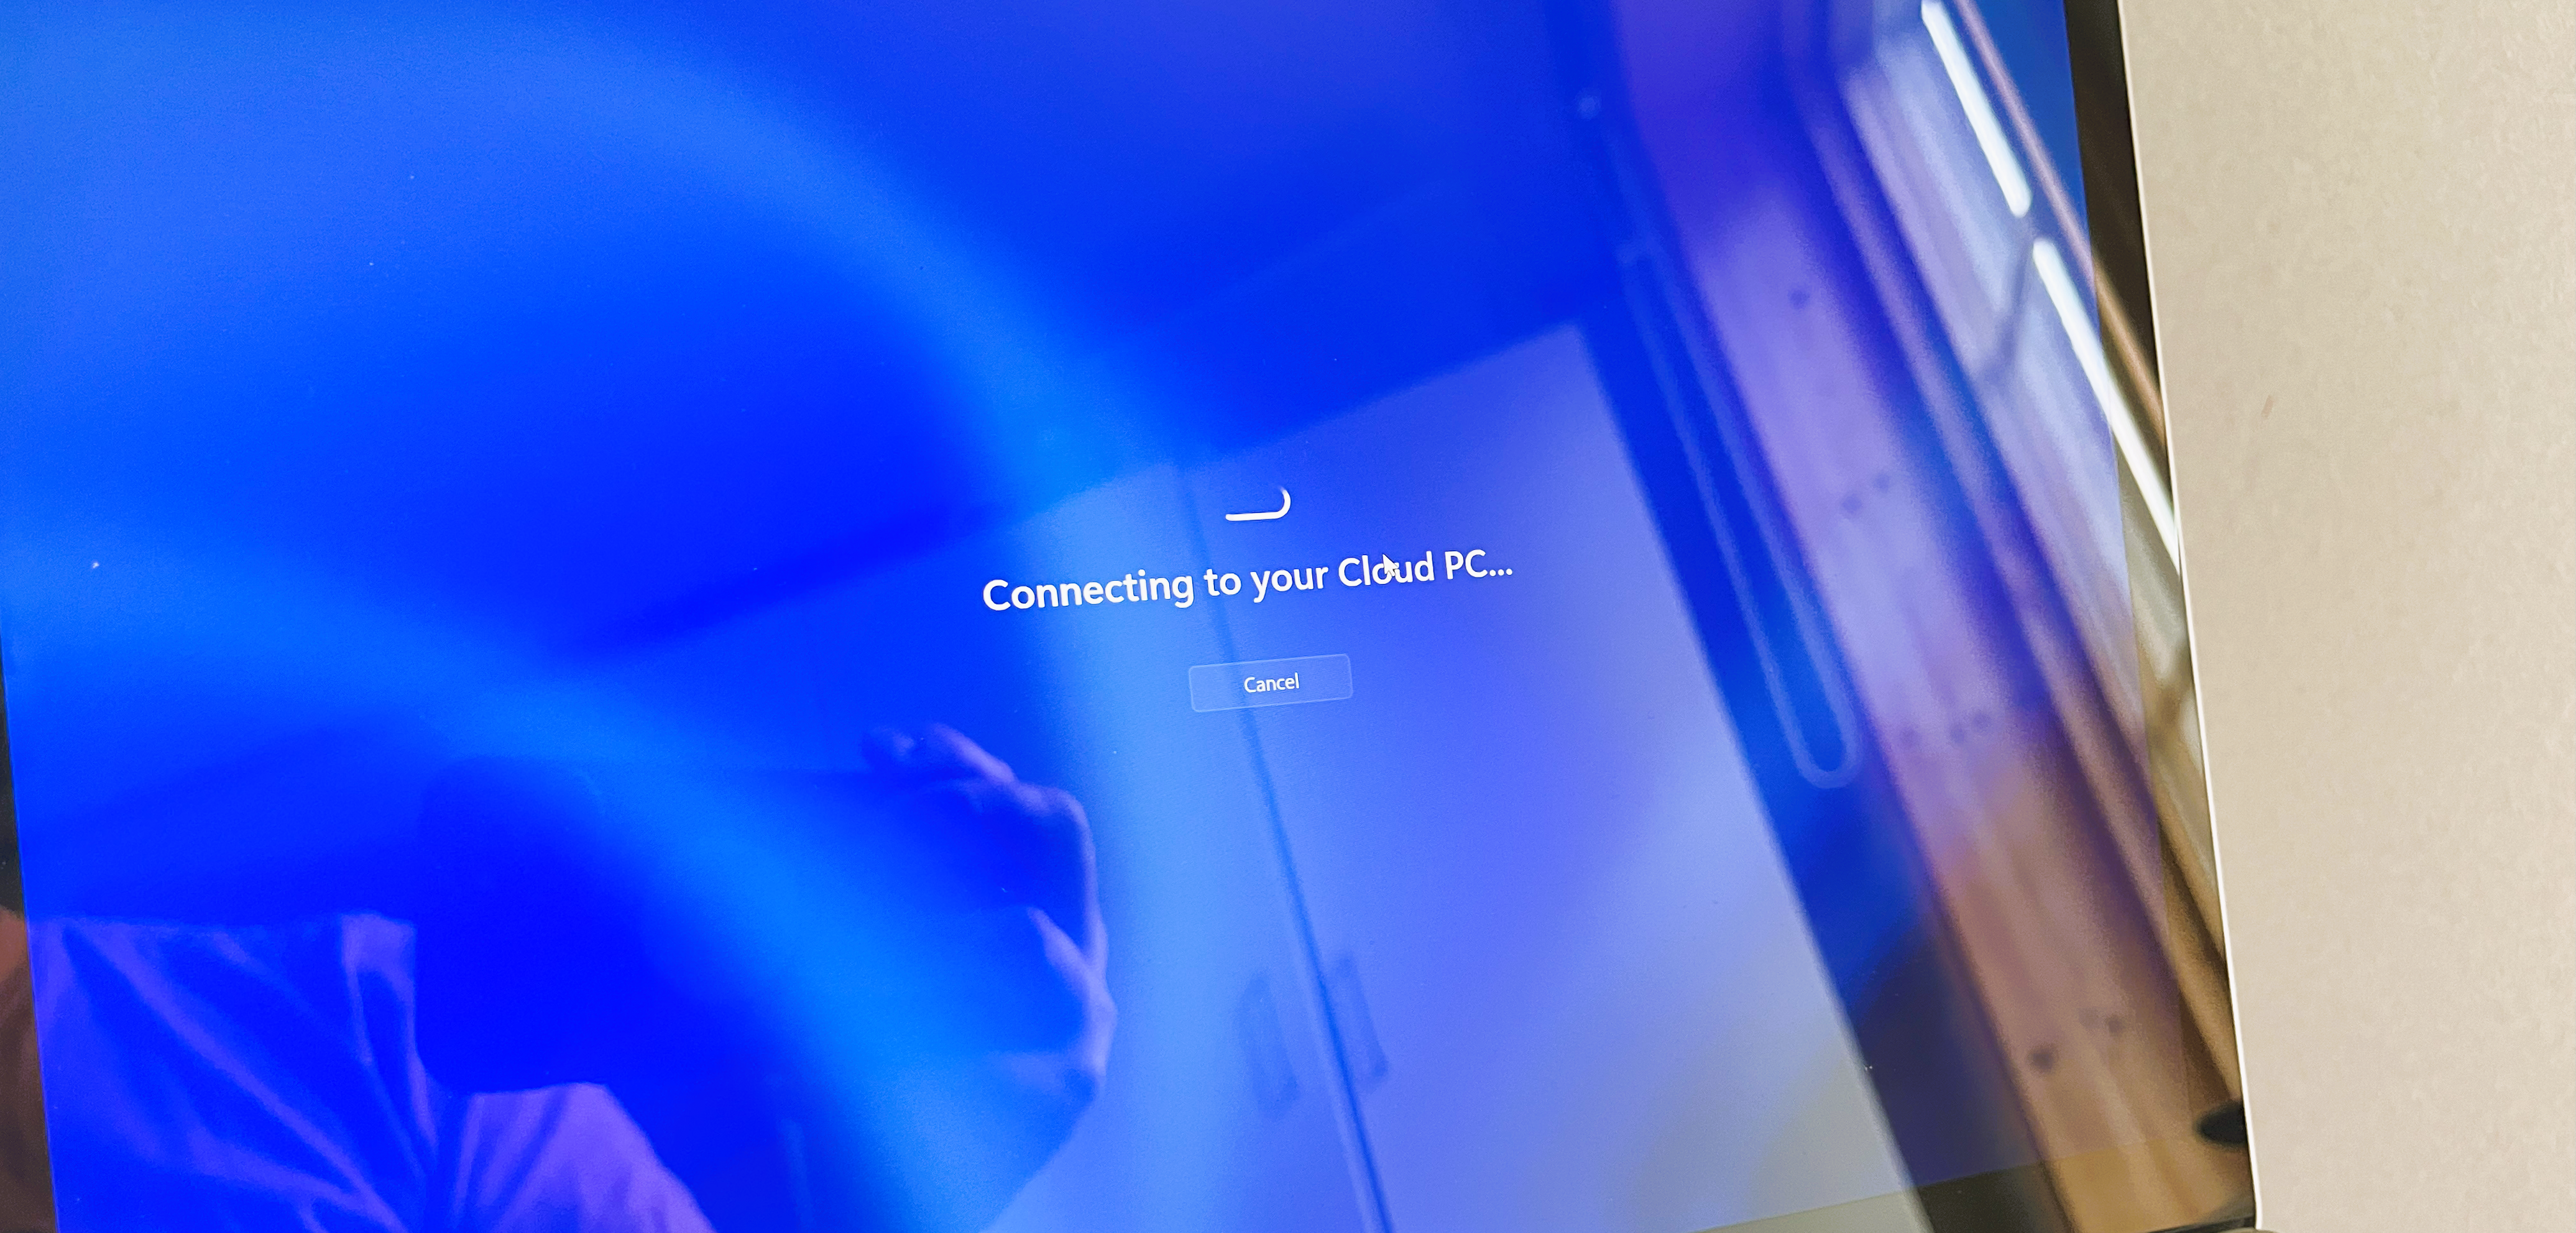
When you click connect, the initial connection will take a little longer and you will see this ribbon on the Cloud PC.

One the machine has booted; you will get a pop-up telling you to make sure to disconnect when you are done since the disconnection is what makes the license available for other users. The time-out time can also be set with policy on the Cloud PC using Intune.

Once I confirm the connection, my Cloud PC will boot up and my session will start.

From here, things are just as with my regular Cloud PC except that applications will be closed, and the Cloud PC will be turned off when I leave the session which results in that I will need to start my applications again. It is not that different from a physical PC which is turned off.

Remote user actions

In the Windows 365 app, as long as your Cloud PC Frontline is up and running, you can perform remote actions such as restart, troubleshoot or restore. But as soon as it’s powered down, you can only see system information and rename your Cloud PC.

Categories
Windows 365

Custom name for Cloud PC

Giving computers custom names is something which is somewhat of a hot potato. We have been doing it for years, and I’ve even blogged about it previously (olastrom.com – Naming conventions). It’s something which is important for some, but from an asset perspective it has kind of played out its role since it is not persistent.

However, one thing that has been a really important thing for some, has been the possibility to configure the naming convention for Windows 365 Cloud PCs which has not been possible. Until now!

With the update in the end of March 2023, this is now doable. It follows the same pattern as the naming convention for Windows Autopilot enrolled devices. You can set a prefix followed by variables. For Cloud PCs, these are a bit different, but follow the same idea.

As you can see by the picture, the name can be between 5 and 15 characters and can include some additional characters except for numbers and letters. The computer name MUST include at least 5 random characters using %RAND:y% where y is the number of random alphanumeric characters. I can however leave out the username and only use random characters.

Configure Cloud PC naming

To configure Cloud PC naming, you can either create a new provisioning policy or change an already existing one. In this example, I will change one of my existing policies. This new setting is by default off in all existing policies and you will need to actively set this for new policies.

Head into Microsoft Intune (intune.microsoft.com) and navigate to Devices > Windows 365 and select the Provisioning Policies tab.

Either select “+ Create policy” or modify an existing policy. I’ve chosen to update my existing policy for my Swedish users. When you get to the “Configuration” step in the policy, you can enable the Cloud PC naming by checking the check-box. It will then display the option to enter a custom name.

As you can see by my example, I’ve chosen to set the policy to give my Cloud PC a name which is CPC followed by five random alphanumeric characters followed by SWE. So, the name could end up being CPC-ABC12-SWE.

Conclusion

“With great power comes great responsibility”. Use naming wisely. To be honest, for Cloud PC naming makes slightly more sense since we don’t have serial numbers or such as an identified. However, naming will change once re-deployed since we have a random part of the name if is enforced. But with this function we can adapt it to fit with the rest of our naming conventions a bit more. You could even just set the same as for all other PCs (except you will get alphanumeric and not numeric random characters).

Categories
Windows 365

Why would you use a Cloud PC?

I’ve been reading a lot of posts lately about the “why” around Cloud PC, why and when you would use a Cloud PC and what the scenarios could be. This inspired me a bit!

The way we often see virtual computers is that “yeah they are great, but this is way too complex for us” or the more common one “we triend that 5 years ago, we won’t go down that route again”.

My idea for this post is to talk a little bit about why you should move to Windows 365 for the bulk of your users and use AVD for those niche implementations where Windows 365 can’t really fulfill your needs today.

Why would you work from a Cloud PC?

Image that you are like me, a consultant, who collaborates with several different customers who all have their own environment. Or maybe you have taken the decision to support Bring Your Own Device (BYOD), which would be a similar scenario for consultants.

When I talk to customers and other people about Windows 365, we often discuss two scenarios:

  • Consultants/part time workers,
  • Mergers and Acquisitions (M&A).

The first one is way more common to be honest since most organisations today have at least some consultants in their team.

If you look at a consultant, they usually work for some kind of company which provides them with a computer which they take with them everywhere they go (I know I do). Since they already have a computer, why give them yet another one to fill their backpack with? Why not use a Cloud PC which they can access from a device of their choice, which you can configure in such a way that information cannot leave the Cloud PC.

Using a Cloud PC, you can give a consultant or employee access to the internal network without them having to install anything on their, by your company, unmanaged device. The device they will work from will be fully managed and you can be sure that you have done everything in your power that you have secured your data.

Working from a Cloud PC isn’t that different from using a physical, since all we do today requires an internet connection anyway. Sure, you get reliant on always having an internet connection (until Windows 365 introduces the offline mode). But let’s face it, we are already reliant on that for collaborating in our daily work, I’m myself never offline unless basically traveling on an airplane.

Environmental impact

There is also another aspect of this, which we might not always talk about, but I find interesting. It’s the fact that getting new computers has a significant impact on the environment, and getting hold of hardware isn’t always that easy nowadays (long lead times).

Using Windows 365 has some environmental benefits compared to physical computers. Firstly, it reduces the amount of energy, water, and resources needed to produce and dispose of physical hardware. Secondly, it optimizes the use of computing resources and reduces energy consumption, which lowers the associated carbon emissions.

However, using virtual desktops needs a reliable internet connection and raises concerns about data privacy and security. Overall, while the environmental impact of using Windows 365 compared to physical computers is complex, cloud-based computing services can reduce the need for physical hardware and use computing resources more efficiently, thus benefiting the environment.

The fact that we can run Cloud PCs on any hardware, this also means that older hardware can be used longer (but be careful using Windows 10 after 14 of October 2025 since it will no longer get patched). There are many ways of making use of older hardware without needing to install Windows on them even. IgelOS is an awesome example of this, and there are many other products like them!

The takeaway

So, what do I think you should take away from this blog post?

Firstly, I think you should seriously consider STOP giving your consultants PCs and have them use Cloud PCs instead. This will save you time and money since you will not have to source computers for them, and it’s not too uncommon that we provide consultants with older hardware which might have reached the end of its lifecycle and might not be too reliant anymore.

There are great examples of this, such as the Swedish manufacturing company Alleima who in a Microsoft customer case describes how they look at this. There is also another Swedish example with the energy company Kraftringen who also went down the same path with using Windows 365 for temporary workers.

Secondly, let’s face it. The consultant already has one computer which they bring wherever they go. Why give them yet another computer they need to fit into their already filled up backpack? And when the assignment is over, you have the hassle of getting that computer back, especially if you have used resources which are not local to your area. Then it needs to be shipped or a visit to the office planned and coordinated.

Using a Cloud PC, you can have a consultant up and running within a few hours, without having to get any kind of hardware to them!

But as always, there are of course instances where a physical machine is required, but I would say that you could solve the consultant situation 80-90% of the time! 😊

Categories
Windows 365

Running Hyper-V on a Cloud PC

This is the second version of this post, since the original one got lost in a recovery since my blog went down.

One thing that many IT pros tend to use a lot is virtual machines in e.g., Hyper-V, for testing or running different things. That is also one excellent advantage of having a physical computer, that possibility to run multiple virtual machines (VM) locally. However, what if you use a Cloud PC and want to run local VMs?

This has been possible since a while back if you were running the fancier SKUs of Windows 365 (the 8 vCPU one), but that is also combined with a higher cost. You could enable the hypervisor on the Cloud PC and run Hyper-V.

However, since February you can run Hyper-V on one of the “lower” SKUs of Windows 365, the 4 vCPU version. This is a fantastic addition to the value Windows 365 brings, since you don’t have to get the fanciest version, you can stick to a more resonable machine.

Enabling Hyper-V

Enabling Hyper-V on a Cloud PC isn’t much different from a physical client. You need to have local admin privileges on the machine, either through given rights or a secondary account. Then search the start menu for “Turn Windows features on or off” and open the dialogue.

Look for Hyper-V in the list of features, select it and then press OK to close the dialogue.

Once you have done this, you will be asked to restart your machine to enable the new Windows features. So go ahead and restart the machine directly or do it later if you need to save any work you have open.

If you want to learn more about the different ways you can enable Hyper-V, check this Microsoft article out, since there are other ways than clicking through the interface Enable Hyper-V on Windows 10 | Microsoft Learn.

Run Hyper-V on your Cloud PC

Just like with any other computer, once the Hyper-V feature has been enabled and you have restarted your machine, you can now go ahead and start the Hyper-V Manager. One thing to keep in mind is that you need to start Hyper-V in an elevated context, otherwise you will not be able to connect to your local machine as a server.

From here you can create your virtual machines using either your own image or using the quick create feature. So, this is nothing different from running Hyper-V on a physical client!

Conclusion

Having the opportunity to utilize Hyper-V, or other types of local virtual machines, can be a crucial feature for many IT Pros. Looking at how Windows 365 is being adopted at least on the Swedish market, we see a lot of consultants and temporary workers using this as their “customer computer”. Since you could now use Hyper-V on even that computer, this means that you no longer need to rely on having test environments on your local machine, opening the possibility to work from more types of devices while still being able to perform task from a more powerful computer.

For me, working as a consultant and mostly utilizing Cloud PCs when working with my customers, this opens new possibilities to run tests in the customers environment in a much simpler way.

Categories
Intune Windows 365

Can we build a Windows 365 kiosk for shared use?

Once every now and then you get one of those weird and maybe a bad ideas and ask yourself:

What if I have a Windows 10 computer which cannot run Windows 11, but I really want to run Windows 11 on it in a supported way?

That was what I asked myself when realizing my old Surface Laptop (first generation) does not support Windows 11.

Putting this in maybe a more real-life like scenario “we have some old hardware and Windows 365. We want to keep using the hardware for a few more years but run Windows 11” or something like that.

This gave me an idea. Can we create a kiosk that runs the Windows 365 app only on a managed Windows 10 computer? And to make it more special, let’s make it as a shared device so that I get MY Cloud PC and you get YOUR Cloud PC! 😊

Since Windows 365 Boot is not coming to Windows 10, we need another solution. This solution could be using kiosk mode and shared mode for Windows.

Pre-reqs

What do we need for this to work?

  • Intune managed Windows 10 computer
  • Computer registered for Windows Autopilot
  • Self-deploying deployment profile for Windows Autopilot
  • Shared device policy
  • Windows 365 license of some sort
  • All other licenses required to use Intune
  • The Remote Desktop application installed on a device
  • An Azure AD group containing out kiosk PCs

And that is about it.

My thought is to use the old school ShellLauncher method for this, not the fancy assigned app setup since we can make this more dynamic if we want to re-purpose this for another application. This means that we could also use Win32 applications and not only UWP apps.

Using the ShellLauncher method in Intune has gotten really easy, it’s just one custom policy and we are set.

Creating the ShellLauncher script

When looking around for a good source, and inspiration, for this setup I came across this post by Michael Niehaus which is really good and even provides a sample script we can use (why re-invent the wheel?).

Using the script example in the blog above, I came up with this script which you can download from my Github repo.

Basically, what you need to update, is the <Shell> section of this part to the path for your application (Win32) or the AUMID (UWP). In this case, the Windows 365 app for Windows 10 which is a UWP app (as stated in the V2:AppType attribute).

If the remote desktop session is closed, the application will restart.

Creating the ShellLauncher policy

For this, we need to create a custom policy in Intune.

First step is to go to Intune (https://endpoint.microsoft.com) and navigate to Devices > Windows > Configuration profiles and select “+ Create profile“. Select Windows 10 and later as platform, Template as profile type and then the Custom template.

Next, we will give our profile a good name so that we know what the profile does. This should be based on your name standard and naming convention for policies. Then hit next at the bottom of the window.

On the “Configuration settings” tab, select “Add” and give the configuration a name (e.g., ShellLauncher V2). As OMA-URI, enter:

./Device/Vendor/MSFT/AssignedAccess/ShellLauncher 

As data type, select “String (XML file)” and upload your XML file. When this is completed, press Save at the bottom of the screen.

You will now see that your setting has been added as a row to this configuration setting and you can press Next at the bottom of the screen.

On the Assignment tab, select the group where you have put you targeted kiosk devices and press Next at the bottom of the screen.

You can skip the “Applicability rules” tab and jump straight to the “Review + create” tab to view a summary of your configuration.

Once you have reviewed your settings, you can press Create and your profile will be created.

Shared device policy

The other profile we need to create is a profile for Shared device. This is done by going to Devices > Windows > Configuration profiles and select “+ Create profile“. Select “Windows 10 and later” as platform, “Templates” as Profile type and find and select “Shared multi-user device” and click create.

Give your profile a name, I will call mine “Win365 Shared Kiosk“. When you have given your profile a name, press next.

On the Configuration settings tab, enable the Shared PC mode and add the settings you need based on your requirements. I will use Domain as Guest account type to ensure that only users from my organization will be allowed to sign in. I will also add some additional settings as you can see from the screen. When you have added your settings, hit next.

Assign your policy to the group you created and used for the ShellLauncher policy and press next.

On the last step, review your settings and click create!

Self-deploying enrollment profile

To have this as a zero-touch installation, which would require zero input from an IT person, we can use the self-deploying deployment profile in Windows Autopilot, which means that we need to create a new profile.

In Intune, head to Devices > Windows > Windows Enrollment > Deployment profiles and select “+ Create profile” and select Windows PC.

First step is as always to give you profile a name, I will call mine “Self deployed Kiosk” and then press next.

On the next tab, select “Self-Deploying (preview)” as Deployment mode. You will then see that almost all fields are grayed out. You can leave all values as default, or choose to change the Language, if keyboard should be automatically configured and if a name template should be used.

Notice: If you are to use this on a virtual machine, you will need to use the user-driver deployment mode since self-deploying requires physical hardware.

For this demo, I will leave everything set to default and press next.

The next step is to set assignments, we will select the Azure AD group we created for the policy for this, but you could also use another group. The important part is that the device is in this group.

Press next and you will end up on the review + create tab where you can review your settings before pressing create.

Once the profile is created, it will take around 15 minutes or so for the enrollment profile to be applied to your device, given that it’s not already included in another active assignment. If that is the case, you need to either add an exclusion group or remove it from the other group before the profile will be assigned.

If you navigate to Devices > Windows > Windows Enrollment > Devices you can look at your device and make sure the correct enrollment profile is assigned.

Deploying our kiosk

This is where the fun begins. Let’s deploy our kiosk to our device!

My device needed to be reset, since it’s already managed by Intune, I can simply just use the wipe command and the device will reset. Since I’ve already added it to the target group for my deployment profile, the enrollment will kick off automatically once the device has been reset. However, if you are connecting using Wi-Fi, you will need to select region, keyboard and Wi-Fi network.

Once the Windows Autopilot enrollment process has completed, my Windows 365 kiosk device is ready, and I can now only run the Windows 365 app on my device.

NOTICE!

There is a big flaw in this design at the moment, and that is the fact that we cannot deploy the W365 application during the ESP at this stage, this means that we need to ensure that the application is installed BEFORE we apply the kiosk profile. If and when we can install the application from the “new store” during ESP, this will not be an issue.

This means that we currently need to wait until the W365 app has been deployed before we assign our kiosk profile.

Additional reading:

Awesome post by a fellow W365 MVP Dominiek: Windows 11 Kiosk With The Windows 365 App – techlab.blog

Post by Michael Niehaus how to create a kiosk using ShellLauncher: Creating a kiosk or digital sign using Windows Autopilot, Intune, and Edge (Chromium) – Out of Office Hours (oofhours.com)

Categories
Windows 365

Deploying Cloud PCs in different regions

Windows 365 and Cloud PCs are as you know PCs running in Azure somewhere. But what if you want to control this “somewhere” and pinpoint the region they are running in? You might have noticed that spinning up a Cloud PC in e.g., Western Europe gives you Google and all web-based things in Dutch. This isn’t too convenient for the end-users who doesn’t speak Dutch. So, let’s try to address that and give a more “local” experience.

I’m thinking of putting users in a Windows 365 region as close as possible to them, hopefully even within the same country. And to top it off, let’s provide them with a Windows experience in their local language, just for the sake of it.

How can we achieve this?

Well, we need two things, we need a provisioning profile per country and an Azure AD group which has been populated with users for each country. The region selected in the network for Windows 365 decides in which region the Cloud PC is hosted.

Setting up Azure AD groups

There are as many ways to do this as there are IT pros, but I decided to make this easy and just look at three things for my groups, attributes that I know all my users have.

What I decided to look at is that:

  • The account is enabled
  • Usage location for the user is set to Sweden
  • And the country for the user is set to Sweden

That got me the following query for my dynamic group.

(user.accountEnabled -eq True) and (user.usageLocation -eq "SE") and (user. Country -eq "Sweden")

To create a new group, head to Groups in the Intune portal and create a new group by pressing “New group“.

Give your group a name, in my case I’ve called it “All users Sweden” since we will gather all Swedish users in this group. Also make sure to set “Membership type” to Dynamic User so that we can create a query to automatically populate the group based on user attributes.

Add your query to your group by pressing “Add dynamic query” and enter your rule. You can take my example and modify it if you like, copy the rule syntax above and press “Edit” on the rule syntax windows and paste it there. This will populate the fields for you, and you can modify them to suit your needs. Or create your own! Keep in mind that the usage location uses the two-letter country code e.g., Sweden is SE, Norway is NO, Netherlands is NL, USA is US.

Press Save when you have created, and validated, your rule and press Create.

We have now successfully created a dynamic group which will be populated with all active accounts which has their country and usage location set to Sweden.

Creating provisioning policies

Now that we have our groups, we want to put them to effective use. Let’s head into the Windows 365 pane in Microsoft Intune by navigating to Devices > Windows 365 and selecting the “Provisioning policies” tab. To create a new policy, click the “+ Create policy” button on the ribbon.

First off, as always, we will give our policy a name, in my case I’m giving it a name indicating that this is a Windows 11 image, Azure AD joined and running on Microsoft hosted network. And this is for my Swedish users.

The next step is to select what kind of join type you will use and which network. In this example, I will use Azure AD join and using the Microsoft hosted network. The dreadful thing about using Sweden as an example here is that we don’t have Windows 365 in Sweden Central, so we will use the next best thing. Norway East!

You can do this for Azure v-nets, but then you need to set the region stuff when setting up the Azure v-net. There is a limit to the amount of how many Azure Network Connections (ANC) you can define per tenant, you can find out more here. If you know that you have multiple locations and want to put the service as close as possible to the end-user, it’s much easier to use the Microsoft hosted network.

The next step is to select an image, I will go with a gallery Windows 11 image since this will reduce the amount of maintenance I need to do since Microsoft is curating the image. Press next when you have selected your image.

Next, we will configure language and region settings. Like I said, the ambition here is to provide the Windows 365 experience in the user’s local language. So, for this I will select Swedish for this policy.

In this section, you can also choose to opt-in to Windows Autopatch straight away if you have this enabled in your tenant. If you do not wish to do so, just leave it to the default value. But since I have it activated in my tenant, I will add this as well and then press next.

The next step is to assign this policy to our group created in the first part. If you wish, you can add multiple groups to the same provisioning profile. But I only have one which will be used for this one, so I will select my group with all Swedish users and press next.

Final step is to review the settings we have selected and then press “Create“.

Conclusion

Now when a Windows 365 license is assigned to a user, their Cloud PC will be provisioned in the region based on which provisioning policy they are assigned to using our dynamic Azure AD group.

The groups don’t need to be dynamic and you could just as easily accomplish this using assigned groups. Also, you could utilize this setup to also include e.g., your developers who need access to a specific Azure v-net for example. In this case you would have provisioning profiles connected to those networks instead of the Microsoft hosted network, giving those users access to that network.

Categories
Intune Windows 365

Ignite 2022 – live in Seattle!

So, 2022 was the year Microsoft Ignite was FINALLY a physical event again, and for the first time on Microsoft home turf in Seattle.

Being an ex-Microsoft FTE, this gave me major flashbacks to TechReady, which was an internal training event Microsoft used to host in Seattle. Same location as Ignite, just no hilarious videos with Norm Judah encouraging everyone to fill out the evaluations.

Ignite was different this year since it’s a hybrid event, and the first big such for Microsoft which means that they are still trying out the concept.

Overall, I had a lot of fun. For me, meeting up with peers and having the time to focus on the content is important, if sessions are digital or physical doesn’t really matter. Some sessions made more sense virtually. But in-person sessions are usually the best, and you could really tell that people wanted this. Especially the big keynotes are always more fun in-person.

But I was missing the expo where you can meet vendors or just mingle with Microsoft people, there wasn’t really any space for this, except for an awesome Surface expo.

However, the width that the “old” Ignite had was missing and the break-down sessions were missing. The feeling was that this hybrid thing was more focused on people attending remote, and people on site were more the live audience.

There was a lot of news and I’ve picked out the ones I found most interesting.

Windows

Just before Ignite kicked off, there was a Surface event where some news around Windows 11 was released. Check it out here:

Introducing new Surface devices that take the Windows PC into the next era of computing | Microsoft Devices Blog

If you want to read more about all the Windows 365 news, check this out: What’s new in Windows 365: Microsoft Ignite 2022 edition – Microsoft Community Hub

Microsoft 365 and Windows 365 in the Metaverse

This was released a few days prior to Microsoft Ignite, but Microsoft 365 and Windows 365 will be supported on Meta Quest devices, providing a new kind of experience for productivity in the Metaverse.

This means that you will be able to run a fully supported productivity setup in the Metaverse with e.g., Microsoft Teams and Windows 365. Windows 365 is not yet released for Metaverse, but this indicates strongly which direction VR is heading now.

On top of Microsoft 365 apps being supported, you will also be able to manage the Meta Quest and Meta Quest 2 using Azure Active Directory and Microsoft Intune, which would provide IT admins with a whole new option of what a PC or workstation is for their end-users. You can read more on this blogpost by Microsoft: Microsoft and Meta partner to deliver immersive experiences for the future of work and play – The Official Microsoft Blog

The new Windows 365 app (preview)

The Remote Desktop app has for long been the go-to application for your VDIs, but now for Windows 365 you can use the brand-new Windows 365 app which is now in public preview. This app aligns more with the Windows 365 features found on the web portal but with the advantages of the desktop app! Read more here:

Experience the Windows 365 app: public preview available now – Microsoft Community Hub

Organizational messages

Getting messages out to end-users is always a struggle within IT. There is a new feature for Windows 11 where you can send organizational messages, natively in Windows, to your users instead of sending them email using Microsoft Intune coming in November to Windows 11 22h2. Read more here:

Deliver organizational messages with Windows 11 and Microsoft Intune – Microsoft Community Hub

Microsoft Intune

No more MEM…

The brand Microsoft Endpoint Manager or MEM is going away. The new product-family name will be Microsoft Intune where a bunch of things will be included, Configuration Manager amongst others. You can read more about the anoncment here:

Introducing the Microsoft Intune product family – Microsoft Community Hub

Add-ons for Microsoft Intune

Add-ons for Microsoft Intune is obviously here to stay, and it’s also growing bigger than just Remote Help which has been an add-on for a while now.

Out of the list of new add-ons coming, what caught my eye especially was these two which I think will solve a lot of headaches for a lot of IT admins.

You can read more here about all new add-ons:

Reduce your overall TCO with a new Microsoft Intune plan – Microsoft Community Hub

Endpoint privilege management in preview

Enabling local admin for users on a temporary basis has been a struggle with Intune managed devices. Old solutions relying on attributes in the on-premises AD do not work and there aren’t really any “best practices” established around this yet.

However, Microsoft is looking to solve this with the Endpoint Privilege Management which is in public preview. Read more in the link above.

Automated app patching as add-on

Keeping applications up to date is something that many stuggles with, and there are products around to solve that. Now Microsoft are throwing themselves into this game as well, which makes a lot of sense. This is just briefly mentioned in the “Further value and looking forward” part of the article, but if they are able to deliver on a native Microsoft Intune feature for this, that would simplify things a lot!

Categories
Windows 365

Cloud PCs and the Impossible travel

Once upon a time, in a data center far far away….

Here is something I learned the hard way in my own tenant. Windows 365 kind of messes with your account security if you are consuming Microsoft 365 services from another device than your cloud PC. Especially if you live in a country like Sweden where the Windows 365 service is yet not available in Sweden Central. Further more, it seams to only affect you the first few times you sign in, before the algorithms learn your behavior.

What happened to me was that Identity Protection and user risk blocked me out from my Cloud PC, since I had defined it to block if user risk was too high and not password change.

It took me a while to just realize what had happened, and how to get around it (since Identity Protection is not an area I’m to familiar with).

Why is that?

Well, there is something called “Impossible travel” or atypical travel which is used to assess the risk of your account being compromised, which means that it’s very unlikely that you would travel from let’s say Stockholm to Amsterdam within a few seconds. This is a very good thing to have in place since it will increase the security of your accounts a lot!

This feature is a part of the Identity Protection part of the Azure AD (which requires a Azure AD P2 license), and can help you identify and take action on risky sign-ins performed by users, or detect if their credentials has been stolen.

There are two key parts of this, Sign-in risk and User risk, and you can control what happens if a user does not live up to the expected level. And of course, Multifactor Authentication (MFA), plays a key role.

Conclusion

I’m not going to dig deep into this at all, just sharing an observation basically. If you want to read more about Identity Protection, I really recommend you having a look at the Microsoft Learn documentation, it provides a good overview.

Like I stated in the beginning of my post, this was something I noticed in my lab, but I’ve not seen it in the wild so far in any production environment. For my environment, I solved it by dismissing the risk for my user which eventually allowed me to sign in.

I’ve spent a good amount of time trying to reproduce this sign-in block, but I haven’t been able to yet.

Have you seen something like this with Cloud PCs?

Categories
Intune Windows 365

Get started with Microsoft Dev Box

Some of you might have seen something called Microsoft Dev Box flash by in your feeds. Something called Dev Box doesn’t really sound like something device-related, it sounds more like something your developers would care about. They probably will, but there is a big reason you should care too.

Microsoft Dev Box is a new tool in the toolbox for you, this time to provide Cloud PCs to your developers or such. There are many similarities between Dev Box and Windows 365, but also Azure Virtual Desktop (AVD). However, your developers can themself deploy computers to your tenant based on a template that you create, which means that a developer could create a new test PC when they need one without really involving you as an admin.

Microsoft Dev Box is not licensed-based like your Windows 365 Cloud PC, instead, it’s consumption-based like an AVD. But you have the simplicity of setting up new computers from Windows 365, so it’s almost like a mix of the two. However, the user target group is different since you can get more powerful machines that are deployed by the user themself.

You can read more about the Microsoft Dev Box here, and what Microsoft calls a “Dev Workstation in the cloud”.

Getting started with Microsoft Dev Box

To get started with Microsoft Dev Box you need the following:

  • An Azure subscription
  • Azure AD
  • Intune tenant
  • Windows licenses (typically as part of your EMS or M365 license)

Setting up the Microsoft Dev box is completely taken care of in the Azure portal, not the Microsoft Endpoint Manager admin center.

To start off, you need to head over to portal.azure.com and make sure you have an active Azure subscription to provision this. Then, search for Microsoft Dev Box.

This is where your different environments will be hosted. You can have multiple Dev Boxes set up for different parts of the organization. In each Dev Box, you can also create different projects. In the real world, you would probably configure this in a landing zone specifically set up for your dev-users who will work on certain projects.

The first step is to create a new Dev-center by pressing “+ Create” in the Microsoft Dev Box pane. Select what subscription and resource group you want to deploy this too and give your Dev-center a name. You will also need to select an Azure region where your machines will be hosted. Since this is a preview, the selection of what Azure data center regions are available is limited. Once you have selected this, press “Review + Create” and create your Dev-center.

Once the Dev-center has successfully deployed, you need to create a Network Connection where you define if your Dev Box PCs should be hybrid-joined or Azure AD joined. Head back to the Microsoft Dev Box pane and select Network Connections (or search Azure for Network Connections).

Select “+ Create” to create a new Network Connection by selecting what subscription and resource group to use. Also, give the network connection a name and select what Azure Vnet you would like to use (if you haven’t created a Vnet already, you will need to do that first). Press “Review + Create” and create your Network Connection.

In this example I’m using Azure AD joined devices as selected as “Domain join type”. If you want to use Hybrid join instead, you will need to add some additional information about your domain.

Once you have created your Network Connection, you will need to create a project. This is where gather each project you would like to use the Dev Box PCs in and define what machines are available by creating Dev Box pools. In the Microsoft Dev Box pane, select Projects.

To create a new Project, click “+ Create” and select what subscription and resource group you want to use. Select which Dev-center you would to use and give your project a name. Press “Review + Create” and create your Project.

Now we need to define what machines are available for our users by creating a Dev box pool. There are a few different “sizes” available, and you can read more about them on Microsoft site about Microsoft Dev Box, where you can find out the pricing for each.

To create a new Dev box definition, navigate to the project you created earlier and select Dev box definition on the bottom of the left-hand menu.

To create a new Dev box definition, select “+ Create“. Give your definition a name and then select a Windows image to use, in this example we will use a Microsoft-provided image, but you could upload your own if you would like. Make the appropriate selections of what size you would like on the machine and click “Create”.

The next step is to create a Dev box pool in your project, do this by navigating to your project you created earlier and selecting Dev box pool.

Create a new Dev box pool by pressing “+ Create” and giving your new pool a name. Select the Dev box definition created earlier and also the network connection. You will also need to confirm that your organization has Azure Hybrid Benefit, you can read more about what that means here.

Once you have filled out this, create the dev box pool by clicking “Create” at the bottom of the page.

The last thing we need to do is to assign users the rights to consume machines and work in our project. Prior to this, it’s a good idea to create an Azure AD group that will contain our users.

To configure the access to our project we will head into “Access control (IAM)” in our project.

To add a new assignment, click “+Add” and select “Add role assignment”. In the list of roles, find and select the “DevCenter Dev Box User” role and press next.

On the next page, add your Azure AD group which contains the users who should have access to the project. Once you have added this group to “Members” press “Review + assign” to finalize your role assignment.

You can verify that the assignment was successful by looking in the list for the role and validating that your group is listed.

And that’s it! You have now successfully prepared your environment to use Microsoft Dev Box!

User experience

For users to create new Microsoft Dev Box machines, they will need to access devbox.microsoft.com and sign in with their user account.

Once signed in, the experience is similar to the Windows 365 end-user portal, but there is a new button called “+New Dev box” where users can deploy machines themself.

Once you click that button, a fly-out will appear where you can see the specification on the machine you are allowed to deploy (based on the definition we made earlier) and you are asked to give your machine a name. Once you have given the machine a name, which will be the name displayed to you for your convenience (MEM will show a CPC-xxxxx name), press “Create“.

The creation of a machine will take somewhere around 30-90 minutes. Once the machine is done, it will show in the portal where you are right now but also in the Remote Desktop app where you have all your other Windows 365 machines. A bonus fact is that it will also appear in the Windows 365 portal, marked as Dev box, but you cannot create new machines from there.

Once the machine has been created, you can connect to it and start using it!

Categories
Intune Windows 365

Disabling ESP on Cloud PC

One thing you will notice if you are deploying Cloud PCs is that the Enrollment Status Page (ESP) from Windows Autopilot will or might appear when a machine is being set up. I’ve seen numerous instances where the ESP has failed causing the Cloud PC to lock out the user at the initial start. This is usually fixed by reprovisioning, but an unnecessary call to the service desk can cause frustration with your users and your administrators.

The ESP is not an important part of the Windows 365 provisioning in most cases, hence it can be disabled by a custom policy.

Create the policy

To create a custom configuration policy, go to the Microsoft Endpoint Manager admin center (endpoint.microsoft.com) and navigate to Devices > Windows > Configurations Profiles.

Select to create a new profile and select Custom as template.

Give your profile a name based on your naming convention and press Next.

Add a new OMA-URI setting by pressing Add.

OMA-URI: ./Vendor/MSFT/DMClient/Provider/MS DM Server/FirstSyncStatus/SkipUserStatusPage

Data type: Boolean

Value: True

Save your setting and press Next.

Select to target All devices but filtered to only target Windows 365 devices. You can read more about how to do that in this blog post about filters.

Finish the wizard by clicking Next until you reach the last step, then click Create.

You have now successfully created a configuration profile that will skip the ESP for all your Cloud PCs.

Summary

The ESP is something that in Windows Autopilot is very useful, but for Windows 365 it’s not crucial. This will also reduce the risk of random errors during provisioning.

Applications that are needed before the user starts working can be assigned using the assignments to “All Devices” and filter out your Cloud PCs since this will evaluate a lot faster than Azure AD groups.